하드웨어준비
RAC를 설치 하려면 아래와같이 최소한 서버 3대가 있어야 한다. 그리고 각각의 서버에 NIC가 2개 이상 필요하다. 두대는 오라클을 설치할 것이고, 한대는 RAC를 위한 NFS서버로써 사용해야 한다. 또한 각 서버당 1개의 공용IP와 1개의 사설IP를 설정하고, 가상IP를 위해 한개의 공용IP가 더 필요하다. 솔라나라에서는 아래와 같이 설정했다. 여기서 e1000g는 각 서버에 설치된 인텔 기가비트 어댑터의 솔라리스 드라이버 이름으로 호스트에 다른 NIC가 설치되어있다면 이름이 달라진다.
| 호스트명 |
호스트 용도 |
e1000g0 IP / 이름 |
e1000g1 IP / 이름 |
VIP / 이름 |
| wl |
Oracle RAC 노드 1, RAC 설치 |
192.168.0.101 / wl |
192.168.1.101 / wl-priv |
192.168.0.151 / wl-vip |
| wl2 |
Oracle RAC 노드 2 |
192.168.0.102 / wl2 |
192.168.1.102 / wl2-priv |
192.168.0.152 / wl2-vip |
| wlnfs |
NFS 서버 |
192.168.0.200 / wlnfs |
192.168.1.200 / wlnfs-priv |
없음 |
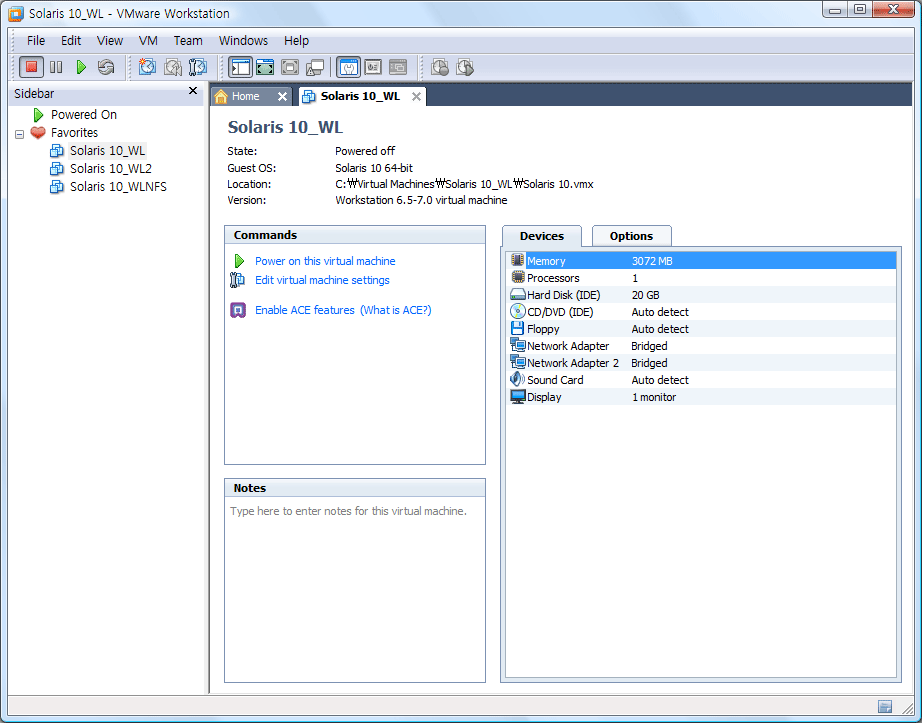
VMWare
VMWare에서는 아래와 같이 설정한다. 기본 설정에서 [Network Adapter]를 하나 더 추가해준다. 메모리는 wl과 wl2에 3GB씩 주었고, wlnfs는 1GB를 주었다. (VirtualBox에서는 VirtualBox 3.0.12, Vista SP2 64bit로 테스트해봤지만 마지막에 오류가 났다. 혹시 해결방법 아시는 분은 게시판에 글을 남겨주기 바란다)
서버 공통 설정
- 각각의 서버에 윈디하나의 솔라나라: Solaris 10 u9 ZFS 설치(데스크탑세션), 윈디하나의 솔라나라: 솔라리스 10 u10 기본 설정를 참고해 아래와 같이 솔라리스를 설치한다.
이후 아래와 같이 추가해준다.
root@모든서버 ~ # cat /etc/hosts
#
# Internet host table
#
::1     localhost
127.0.0.1       localhost	loghost
192.168.0.101   wl
192.168.0.151   wl-vip
192.168.0.102   wl2
192.168.0.152   wl2-vip
192.168.0.200   wlnfs
192.168.1.101   wl-priv
192.168.1.102   wl2-priv
192.168.1.200   wlnfs-priv
root@모든서버 ~ #
root@wl ~ # ifconfig -a
lo0: flags=2001000849<UP,LOOPBACK,RUNNING,MULTICAST,IPv4,VIRTUAL> mtu 8232 index 1
        inet 127.0.0.1 netmask ff000000
e1000g0: flags=1000843<UP,BROADCAST,RUNNING,MULTICAST,IPv4> mtu 1500 index 2
        inet 192.168.0.101 netmask ffffff00 broadcast 192.168.0.255
        ether 0:c:29:15:32:52
e1000g1: flags=1000843<UP,BROADCAST,RUNNING,MULTICAST,IPv4> mtu 1500 index 3
        inet 192.168.1.101 netmask ffffff00 broadcast 192.168.1.255
        ether 0:c:29:15:32:5c
root@wl ~ #
root@wl2 ~ # ifconfig -a
lo0: flags=2001000849<UP,LOOPBACK,RUNNING,MULTICAST,IPv4,VIRTUAL> mtu 8232 index 1
        inet 127.0.0.1 netmask ff000000
e1000g0: flags=1000843<UP,BROADCAST,RUNNING,MULTICAST,IPv4> mtu 1500 index 2
        inet 192.168.0.102 netmask ffffff00 broadcast 192.168.0.255
        ether 0:c:29:ab:ca:d4
e1000g1: flags=1000843<UP,BROADCAST,RUNNING,MULTICAST,IPv4> mtu 1500 index 3
        inet 192.168.1.102 netmask ffffff00 broadcast 192.168.1.255
        ether 0:c:29:ab:ca:de
root@wl2 ~ #
root@wlnfs ~ # ifconfig -a
lo0: flags=2001000849<UP,LOOPBACK,RUNNING,MULTICAST,IPv4,VIRTUAL> mtu 8232 index 1
        inet 127.0.0.1 netmask ff000000
e1000g0: flags=1000843<UP,BROADCAST,RUNNING,MULTICAST,IPv4> mtu 1500 index 2
        inet 192.168.0.200 netmask ffffff00 broadcast 192.168.0.255
        ether 0:c:29:49:35:15
e1000g1: flags=1000843<UP,BROADCAST,RUNNING,MULTICAST,IPv4> mtu 1500 index 3
        inet 192.168.1.200 netmask ffffff00 broadcast 192.168.1.255
        ether 0:c:29:49:35:1f
root@wlnfs ~ #
- 각각의 서버에 윈디하나의 솔라나라: Oracle 10g R2을 참조해
oracle 계정을 생성한다. 생성 후에는 아래와 같이 모든 서버에서 oracle으로 전환 되어야 한다.
root@모든서버 ~ # su - oracle
oracle@모든서버 ~ $
- 경고메시지를 방지하는 차원에서, 솔라리스 10 시디를 넣은 후 SUNWi1cs, SUNWi15cs 패키지를 설치한다. (이 패키지는
X11 ISO8859-1 Codeset Support
, X11 ISO8859-15 Codeset Support
패키지다. 우리나라에서는 안해도 된다)
root@wl,wl2 /cdrom/sol_10_1009_x86/Solaris_10/Product # pkgadd -d . SUNWi1cs
root@wl,wl2 /cdrom/sol_10_1009_x86/Solaris_10/Product # pkgadd -d . SUNWi15cs
NFS용 서버 준비
wlnfs에 솔라리스 10을 설치하고 NFS로 wlnfs의 디렉토리를 공유할 수 있도록 아래와 같이 설정한다. 오라클 설치파일의 압축을 풀어놓고, 아래와 같이 디렉토리를 공유해야 한다. NFS와 관련된 사항은 윈디하나의 솔라나라: NFS를 참고한다.
| 공유 디렉토리 경로 |
용도 |
옵션 |
| /export/rac/oracrs |
Oracle Clusterware 공유 데이터가 저장될 위치 |
rw,root=wl:wl2,anon=0 |
| /export/rac/oradata |
Oracle Database 데이터가 저장될 위치 |
rw,root=wl:wl2,anon=0 |
| /export/rac/flash_recovery_area |
Oracle Database Flash 데이터가 저장될 위치 |
rw,root=wl:wl2,anon=0 |
| /export/rac/orainst |
Oracle Database, Clusterware 설치파일 |
ro |
1) ocr은 Oracle Cluster Registry의 약어로 오라클 클러스터링과 관련된 정보를 저장할 파일을 생성한다.
UFS를 사용하는 경우
root@wlnfs ~ # mkdir /export/rac
root@wlnfs ~ # mkdir /export/rac/oracrs
root@wlnfs ~ # mkdir /export/rac/oradata
root@wlnfs ~ # mkdir /export/rac/orainst
root@wlnfs ~ # mkdir /export/rac/oraflash
root@wlnfs ~ # mkdir /export/rac/oraasm
root@wlnfs ~ # chown -R oracle:oinstall /export/rac
root@wlnfs ~ # vi /etc/dfs/dfstab
share -F nfs -o rw,anon=0,root=wl,root=wl2 /export/rac/oracrs
share -F nfs -o rw,anon=0,root=wl,root=wl2 /export/rac/oradata
share -F nfs -o rw,anon=0,root=wl,root=wl2 /export/rac/oraflash
share -F nfs -o rw,anon=0,root=wl,root=wl2 /export/rac/oraasm
share -F nfs -o ro /export/rac/orainst
root@wlnfs ~ # shareall
ZFS를 사용하는 경우
root@wlnfs ~ # zfs create rpool/export/rac
root@wlnfs ~ # zfs create rpool/export/rac/oracrs
root@wlnfs ~ # zfs create rpool/export/rac/oradata
root@wlnfs ~ # zfs create rpool/export/rac/orainst
root@wlnfs ~ # zfs create rpool/export/rac/oraflash
root@wlnfs ~ # zfs create rpool/export/rac/oraasm
root@wlnfs ~ # chown -R oracle:oinstall /export/rac
root@wlnfs ~ # zfs set sharenfs=rw,anon=0,root=wl:wl2 rpool/export/rac/oracrs
root@wlnfs ~ # zfs set sharenfs=rw,anon=0,root=wl:wl2 rpool/export/rac/oradata
root@wlnfs ~ # zfs set sharenfs=rw,anon=0,root=wl:wl2 rpool/export/rac/oraflash
root@wlnfs ~ # zfs set sharenfs=rw,anon=0,root=wl:wl2 rpool/export/rac/oraasm
root@wlnfs ~ # zfs set sharenfs=ro rpool/export/rac/orainst
root@wlnfs ~ # zfs share -a
share 설정 이후 공통
root@wlnfs ~ # share
-               /export/rac/oraflash   anon=0,sec=sys,rw,root=wl:wl2   ""
-               /export/rac/oracrs     anon=0,sec=sys,rw,root=wl:wl2   ""
-               /export/rac/orainst    sec=sys,ro   ""
-               /export/rac/oraasm     anon=0,sec=sys,rw,root=wl:wl2   ""
-               /export/rac/oradata    anon=0,sec=sys,rw,root=wl:wl2   ""
root@wlnfs ~ # dd if=/dev/zero of=/export/rac/oracrs/ocr_disk bs=1024k count=512
root@wlnfs ~ # dd if=/dev/zero of=/export/rac/oracrs/voting_disk bs=1024k count=512
root@wlnfs ~ # chown oracle:oinstall /export/rac/oracrs/*
root@wlnfs ~ # chmod 664 /export/rac/oracrs/*
root@wlnfs ~ # mkdir /export/rac/oraasm/nfsdg
root@wlnfs ~ # dd if=/dev/zero of=/export/rac/oraasm/nfsdg/disk1 bs=1024k count=1024
root@wlnfs ~ # dd if=/dev/zero of=/export/rac/oraasm/nfsdg/disk2 bs=1024k count=1024
root@wlnfs ~ # chown -R oracle:oinstall /export/rac/oraasm
root@wlnfs ~ # chmod -R 664 /export/rac/oraasm/nfsdg/*
root@wlnfs ~ # cd /export/rac/orainst
root@wlnfs /export/rac/orainst $ unzip ~/10201_clusterware_solx86_64.zip
root@wlnfs /export/rac/orainst $ unzip ~/10201_database_solx86_64.zip
노드용 서버 준비 - NFS
wlnfs의 공유 디렉토리를 마운트해놓는다. 오라클 RAC는 /usr/local/ssh, /usr/local/scp를 참조하기 때문에 미리 심볼릭 링크를 걸어놓는다.
root@wl,wl2 ~ # mkdir /export/rac
root@wl,wl2 ~ # mkdir /export/rac/oracrs
root@wl,wl2 ~ # mkdir /export/rac/oradata
root@wl,wl2 ~ # mkdir /export/rac/orainst
root@wl,wl2 ~ # mkdir /export/rac/oraflash
root@wl,wl2 ~ # mkdir /export/rac/oraasm
root@wl,wl2 ~ # ln -s /usr/bin/ssh /usr/local/bin/ssh
root@wl,wl2 ~ # ln -s /usr/bin/scp /usr/local/bin/scp
root@wl,wl2 ~ # vi /etc/vfstab
wlnfs-priv:/export/rac/oracrs			-	/export/rac/oracrs		nfs	-	yes	rw,hard,nointr,rsize=32768,wsize=32768,proto=tcp,noac,forcedirectio,vers=3
wlnfs-priv:/export/rac/oradata			-	/export/rac/oradata		nfs	-	yes	rw,hard,nointr,rsize=32768,wsize=32768,proto=tcp,noac,forcedirectio,vers=3
wlnfs-priv:/export/rac/oraflash			-	/export/rac/oraflash	nfs	-	yes	rw,hard,nointr,rsize=32768,wsize=32768,proto=tcp,noac,forcedirectio,vers=3
wlnfs-priv:/export/rac/oraasm			-	/export/rac/oraasm		nfs	-	yes	rw,hard,nointr,rsize=32768,wsize=32768,proto=tcp,noac,forcedirectio,vers=3
wlnfs-priv:/export/rac/orainst			-	/export/rac/orainst		nfs	-	yes	ro
root@wl,wl2 ~ # mountall 1)
mount: /tmp이(가) 이미 마운트되었거나 swap이(가) 사용 중입니다.
root@wl,wl2 ~ # svcadm enable nfs/client
root@wl,wl2 ~ # reboot 2)
1) /tmp와 관련된 오류 이외의 것이 발생하면 안된다.
2) 반드시 재시작해서 /export/rac/crs, /export/rac/oradata, /export/rac/orainst가 제대로 마운트되는지 확인한다.
노드용 서버 준비 - SSH
윈디하나의 솔라나라: SSH 의 공개키를 이용한 접속을 참조해, wl의 oracle 계정에서 ssh, scp를 사용해 wl2의 oracle 계정에 별도의 패스워드 입력 없이 접속 가능하게 만들어야 한다. 키는 RSA와 DSA 키를 모두 생성해야 한다. user equivalence 를 확인하기 위해 이 작업이 반드시 필요하다. 오라클 설치및 데이터베이스 생성및 설정(dbca, netca 등의 명령 실행시)프로그램이 다른 노드의 데이터를 변경하기 위해 ssh와 scp를 이용해 자동으로 접속하도록 되어있다.
솔라나라에서는 wl에서 설치를 하고 설정을 하기 때문에 wl에서만 wl2에 인증 없이 접속 가능하게 하면 된다. (wl2 에서 wl로는 안되도 상관 없다)
oracle@wl ~ $ ssh-keygen -t dsa
공개/전용 dsa 키  쌍 생성중.
키를 저장할 파일을  입력하십시오. (/export/home/oracle/.ssh/id_dsa):
디렉토리 '/export/home/oracle/.ssh'를 만들었음.
passphrase 입력 (passphrase가 없을 경우 비어 있음):
동일한 passphrase를 다시  입력하십시오:
귀하의 ID가 /export/home/oracle/.ssh/id_dsa에   저장되었습니다.
귀하의 공개 키가 /export/home/oracle/.ssh/id_dsa.pub에   저장되었습니다.
키 지문:
57:e9:c2:e4:02:20:e3:c2:41:d5:16:3d:de:1a:10:8e oracle@wl
oracle@wl ~ $ ssh-keygen -t rsa
공개/전용 rsa 키  쌍 생성중.
키를 저장할 파일을  입력하십시오. (/export/home/oracle/.ssh/id_rsa):
passphrase 입력 (passphrase가 없을 경우 비어 있음):
동일한 passphrase를 다시  입력하십시오:
귀하의 ID가 /export/home/oracle/.ssh/id_rsa에   저장되었습니다.
귀하의 공개 키가 /export/home/oracle/.ssh/id_rsa.pub에   저장되었습니다.
키 지문:
e5:7a:e6:63:c6:f0:96:ea:8d:52:2d:55:e5:96:cd:9f oracle@wl
oracle@wl ~ $ cat ./.ssh/id_dsa.pub >> ./.ssh/authorized_keys
oracle@wl ~ $ cat ./.ssh/id_rsa.pub >> ./.ssh/authorized_keys
oracle@wl ~ $ scp ./.ssh/authorized_keys wl2:./.ssh/
아래와 같이 실행되어야 한다.
oracle@wl ~ $ ssh wl id 1)
uid=201(oracle) gid=201(oinstall)
oracle@wl ~ $ ssh wl2 id 1)
uid=201(oracle) gid=201(oinstall)
oracle@wl ~ $
1) wl → wl, wl → wl2 접속이 키보드 입력 없이 인증되어야 한다. 아래와 같이 패스워드 또는 키암호룰 묻거나, 아래와 같이 핑거프린트를 저장할것인가 물어보는 메시지가 뜨면 안된다.
oracle@wl ~ $ ssh wl
호스트 'wl (192.168.0.101)'의 인증을 설정할 수 없습니다..
RSA 주요 지문은 85:3c:85:be:df:62:ab:f4:1d:c1:02:2f:b0:c5:00:5e입니다.
연결을 계속하시겠습니까(y/n)?
oracle@wl ~ $ ssh wl
'/export/home/oracle/.ssh/id_dsa' 키에 대한 암호문을 입력하십시오.

oracle@wl ~/.ssh $ ssh wl
The authenticity of host 'wl (192.168.0.101)' can't be established.
RSA key fingerprint is 85:3c:85:be:df:62:ab:f4:1d:c1:02:2f:b0:c5:00:5e.
Are you sure you want to continue connecting (yes/no)?
oracle@wl ~ $ ssh wl
Enter passphrase for key '/export/home/oracle/.ssh/id_dsa':
노드용 서버 준비 - ORACLE SID
오라클 계정의 환경 변수를 수정해야 한다. .profile을 아래와 같이 변경해놓는다. wl의 sid는 orcl1, wl2의 sid는 orcl2로 변경한다.
oracle@wl ~ $ vi .profile
DISPLAY=:0.0; export DISPLAY
ORACLE_BASE=/export/home/oracle; export ORACLE_BASE
NLS_LANG=Korean_Korea.UTF8; export NLS_LANG
ORACLE_SID=orcl1; export ORACLE_SID
ORA_CRS_HOME=$ORACLE_BASE/product/10.2.0/crs; export ORA_CRS_HOME
ORACLE_HOME=$ORACLE_BASE/product/10.2.0/db_1; export ORACLE_HOME
PATH=$PATH:$ORACLE_HOME/bin; export PATH
LD_LIBRARY_PATH=$LD_LIBRARY_PATH:$ORACLE_HOME/lib

if [ -f ~/.ssh/id_dsa -o -f ~/.ssh/id_rsa ]; then
        eval `/usr/bin/ssh-agent`
        /usr/bin/ssh-add
fi
oracle@wl ~ $ vi ~/.bash_logout
LANG=C; eval `/usr/bin/ssh-agent -k`
oracle@wl ~ $
oracle@wl2 ~ $ vi .profile
...
ORACLE_SID=orcl2; export ORACLE_SID
...
oracle@wl2 ~ $ vi ~/.bash_logout
...
oracle@wl2 ~ $
노드용 서버 준비 - 확인
아래와 같이 설정을 확인한다. [운영 체제 패치 검사] 오류는 무시할 수 있다.
oracle@wl /export/rac/orainst/clusterware/cluvfy $ ./runcluvfy.sh stage -pre crsinst -n wl,wl2 -verbose

클러스터 서비스 설정에 대한 사전 확인 수행

노드 연결 가능성을 검사하는 중...

검사: "wl" 노드에서의 노드 연결 가능성
  대상 노드                                 연결 가능?
  ------------------------------------  ------------------------
  wl2                                   예
  wl                                    예
결과: "wl" 노드에서 노드 연결 가능성 검사를 성공했습니다.


사용자 equivalence를 검사하는 중...

검사: 사용자 "oracle"에 대한 사용자 equivalence
  노드 이름                                 설명
  ------------------------------------  ------------------------
  wl                                    성공
  wl2                                   성공
결과: 사용자 "oracle"에 대한 사용자 equivalence 검사를 성공했습니다.

관리 권한을 검사하는 중...

검사: 사용자 "oracle" 존재 여부
  노드 이름         사용자가 존재함                  설명
  ------------  ------------------------  ------------------------
  wl            예                         성공
  wl2           예                         성공
결과: "oracle"에 대한 사용자 존재 여부 검사를 성공했습니다.

검사: "oinstall" 그룹 존재 여부
  노드 이름         상태                        그룹 ID
  ------------  ------------------------  ------------------------
  wl            존재함                       201
  wl2           존재함                       201
결과: "oinstall"에 대한 그룹 존재 여부 검사를 성공했습니다.

검사: "oinstall" 그룹[기본]의 사용자 "oracle"에 대한 멤버쉽
  노드 이름             사용자가 존재함      그룹이 존재함       그룹의 사용자      기본            설명
  ----------------  ------------  ------------  ------------  ------------  ------------
  wl2               예             예             예             예 성공
  wl                예             예             예             예 성공
결과: "oinstall" 그룹[기본]의 사용자 "oracle"에 대한 멤버쉽 검사를 성공했습니다.
관리 권한 검사를 성공했습니다.

노드 연결을 검사하는 중...


"wl" 노드에 대한 인터페이스 정보
  인터페이스 이름                        IP 주소                           서브 넷
  ------------------------------  ------------------------------  ----------------
  e1000g0                         192.168.0.101                   192.168.0.0
  e1000g1                         192.168.1.101                   192.168.1.0


"wl2" 노드에 대한 인터페이스 정보
  인터페이스 이름                        IP 주소                           서브 넷
  ------------------------------  ------------------------------  ----------------
  e1000g0                         192.168.0.102                   192.168.0.0
  e1000g1                         192.168.1.102                   192.168.1.0


검사: "192.168.0.0" 서브넷에 대한 노드 연결
  소스                              대상                              접속됨?
  ------------------------------  ------------------------------  ----------------
  wl:e1000g0                      wl2:e1000g0                     예
결과: wl,wl2개의 노드를 사용하는 "192.168.0.0" 서브넷에 대한 노드 연결 검사를 성공했습니다.

검사: "192.168.1.0" 서브넷에 대한 노드 연결
  소스                              대상                              접속됨?
  ------------------------------  ------------------------------  ----------------
  wl:e1000g1                      wl2:e1000g1                     예
결과: wl,wl2개의 노드를 사용하는 "192.168.1.0" 서브넷에 대한 노드 연결 검사를 성공했습니다.

"192.168.0.0" 서브넷에서 전용 상호 접속에 대해 적합한 인터페이스:
wl e1000g0:192.168.0.101
wl2 e1000g0:192.168.0.102

"192.168.1.0" 서브넷에서 전용 상호 접속에 대해 적합한 인터페이스:
wl e1000g1:192.168.1.101
wl2 e1000g1:192.168.1.102

ERROR:
VIP에 대해 적합한 인터페이스 집합을 찾을 수 없습니다.

결과: 노드 연결 검사를 실패했습니다.

시스템 요구 사항을 검사하는 중 'crs'...

검사: 총 메모리
  노드 이름         사용 가능                     필수                        설명
  ------------  ------------------------  ------------------------  ----------
  wl2           2GB (2097152KB)           512MB (524288KB)          성공
  wl            2GB (2097152KB)           512MB (524288KB)          성공
결과: 총 메모리 검사를 성공했습니다.

검사: "/tmp" 디렉토리의 사용 가능한 디스크 공간
  노드 이름         사용 가능                     필수                        설명
  ------------  ------------------------  ------------------------  ----------
  wl2           1.96GB (2054104KB)        400MB (409600KB)          성공
  wl            1.39GB (1453024KB)        400MB (409600KB)          성공
결과: 사용 가능한 디스크 공간 검사를 성공했습니다.

검사: 교체 공간
  노드 이름         사용 가능                     필수                        설명
  ------------  ------------------------  ------------------------  ----------
  wl2           1024MB (1048572KB)        512MB (524288KB)          성공
  wl            1024MB (1048572KB)        512MB (524288KB)          성공
결과: 교체 공간 검사를 성공했습니다.

검사: 시스템 구조
  노드 이름         사용 가능                     필수                        설명
  ------------  ------------------------  ------------------------  ----------
  wl2           64-bit                    64-bit                    성공
  wl            64-bit                    64-bit                    성공
결과: 시스템 구조 검사를 성공했습니다.

검사: 운영 체제 버전
  노드 이름         사용 가능                     필수                        설명
  ------------  ------------------------  ------------------------  ----------
  wl2           SunOS 5.10                SunOS 5.10                성공
  wl            SunOS 5.10                SunOS 5.10                성공
결과: 운영 체제 버전 검사를 성공했습니다.

검사: "118345-03"에 대한 운영 체제 패치
  노드 이름         적용됨                       필수                        설 명
  ------------  ------------------------  ------------------------  ----------
  wl2           알 수 없음                    118345-03                 실패
  wl            알 수 없음                    118345-03                 실패
결과: "118345-03"에 대한 운영 체제 패치 검사를 실패했습니다.

검사: "119961-01"에 대한 운영 체제 패치
  노드 이름         적용됨                       필수                        설 명
  ------------  ------------------------  ------------------------  ----------
  wl2           119961-05                 119961-01                 성공
  wl            119961-05                 119961-01                 성공
결과: "119961-01"에 대한 운영 체제 패치 검사를 성공했습니다.

검사: "117837-05"에 대한 운영 체제 패치
  노드 이름         적용됨                       필수                        설 명
  ------------  ------------------------  ------------------------  ----------
  wl2           알 수 없음                    117837-05                 실패
  wl            알 수 없음                    117837-05                 실패
결과: "117837-05"에 대한 운영 체제 패치 검사를 실패했습니다.

검사: "117846-08"에 대한 운영 체제 패치
  노드 이름         적용됨                       필수                        설 명
  ------------  ------------------------  ------------------------  ----------
  wl2           알 수 없음                    117846-08                 실패
  wl            알 수 없음                    117846-08                 실패
결과: "117846-08"에 대한 운영 체제 패치 검사를 실패했습니다.

검사: "118682-01"에 대한 운영 체제 패치
  노드 이름         적용됨                       필수                        설 명
  ------------  ------------------------  ------------------------  ----------
  wl2           알 수 없음                    118682-01                 실패
  wl            알 수 없음                    118682-01                 실패
결과: "118682-01"에 대한 운영 체제 패치 검사를 실패했습니다.

검사: "dba"에 대한 그룹 존재 여부
  노드 이름         상태                        설명
  ------------  ------------------------  ------------------------
  wl2           존재함                       성공
  wl            존재함                       성공
결과: "dba"에 대한 그룹 존재 여부 검사를 성공했습니다.

검사: "oinstall"에 대한 그룹 존재 여부
  노드 이름         상태                        설명
  ------------  ------------------------  ------------------------
  wl2           존재함                       성공
  wl            존재함                       성공
결과: "oinstall"에 대한 그룹 존재 여부 검사를 성공했습니다.

검사: "oracle"에 대한 사용자 존재 여부
  노드 이름         상태                        설명
  ------------  ------------------------  ------------------------
  wl2           존재함                       성공
  wl            존재함                       성공
결과: "oracle"에 대한 사용자 존재 여부 검사를 성공했습니다.

검사: "nobody"에 대한 사용자 존재 여부
  노드 이름         상태                        설명
  ------------  ------------------------  ------------------------
  wl2           존재함                       성공
  wl            존재함                       성공
결과: "nobody"에 대한 사용자 존재 여부 검사를 성공했습니다.

시스템 요구 사항 검사를 실패했습니다. 'crs'

모든 노드에서 클러스터 서비스 설정에 대한 사전 확인을 실패했습니다.
oracle@wl /export/rac/orainst/clusterware/cluvfy $
[ERROR: Could not find a suitable set of interfaces for VIPs (VIP에 대해 적합한 인터페이스 집합을 찾을 수 없습니다)]메시지는 무시한다. 실패했지만, 정상적으로 설치 가능하다. 위에서 성공으로 나온 항목은 반드시 성공해야 한다.
노드용 서버 준비 - 설치를 시작하기 전에
여기까지 했다면 사전 준비는 모두 끝난 셈이다. ZFS를 사용하고 있다면 설치하기에 앞서 아래와 같이 스냅샷을 찍어둘 것을 권장한다.
root@wl,wl2 ~ # zfs snapshot rpool/ROOT/rset@beforeorainst
root@wl,wl2 ~ # zfs snapshot rpool/export/home@beforeorainst
root@wl,wl2 ~ # zfs snapshot rpool/ROOT/rset/var@beforeorainst
root@wl,wl2 ~ # zfs list
rpool                            19.5G  89.8G    34K  /rpool
rpool/ROOT/rset@beforeorainst        0      -    34K  -
rpool/export/home@beforeorainst      0      -    34K  -
root@wl,wl2 ~ #
만약 설치도중 문제가 생겼을 경우에 아래와 같이 하면 오라클 설치 전으로 되돌릴 수 있다.
root@wl,wl2 ~ # zfs rollback rpool/ROOT/rset@beforeorainst
root@wl,wl2 ~ # zfs rollback rpool/export/home@beforeorainst
root@wl,wl2 ~ # zfs rollback rpool/ROOT/rset/var@beforeorainst
clusterware 설치
인스톨러를 실행하기에 앞서서 각 노드마다 rootpre.sh를 실행해본다. 솔라리스에서는 SunCluster 가 있는지 확인해야 하기 때문이다.
root@wl,wl2 /export/rac/orainst/clusterware/rootpre # ./rootpre.sh
No SunCluster running
실행했다면 아래와 같이 인스톨러를 실행한다.
root@wl ~ # xhost +
root@wl ~ # su - oracle
oracle@wl ~ $ cd /export/rac/orainst/clusterware
oracle@wl /export/rac/orainst/clusterware $ ./runInstaller
...
Has 'rootpre.sh' been run by root? [y/n] (n)
y
...
oracle@wl /export/rac/orainst/clusterware $

- [다음]를 클릭한다.
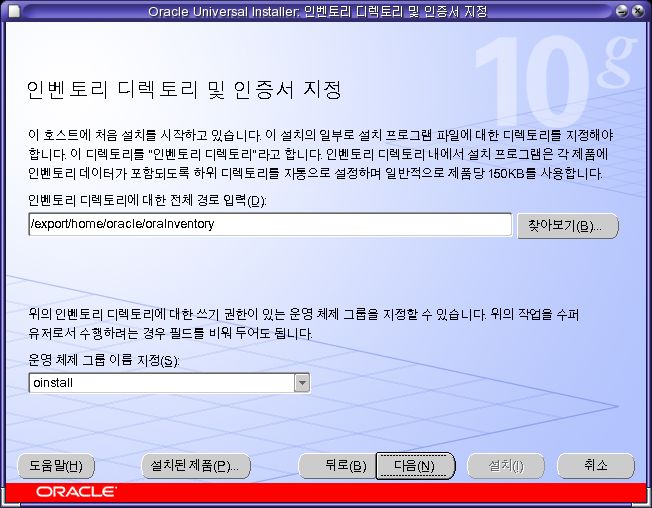
- 인벤토리 설정 화면이다. [다음]을 클릭한다.
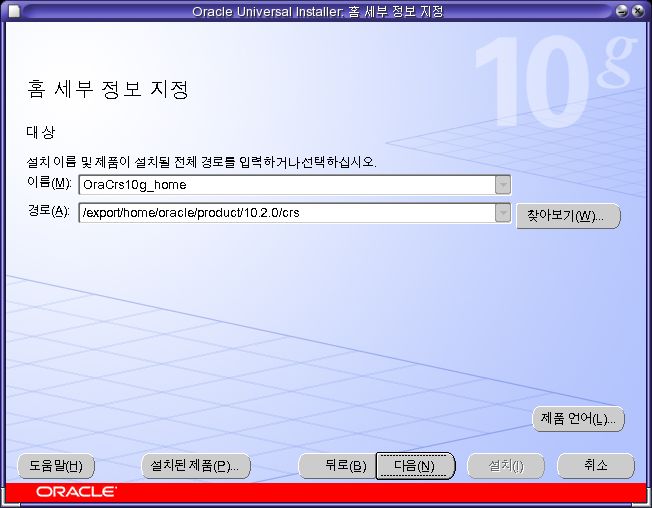
- CRS의 홈 디렉토리를 설정한다. [다음]을 클릭한다.
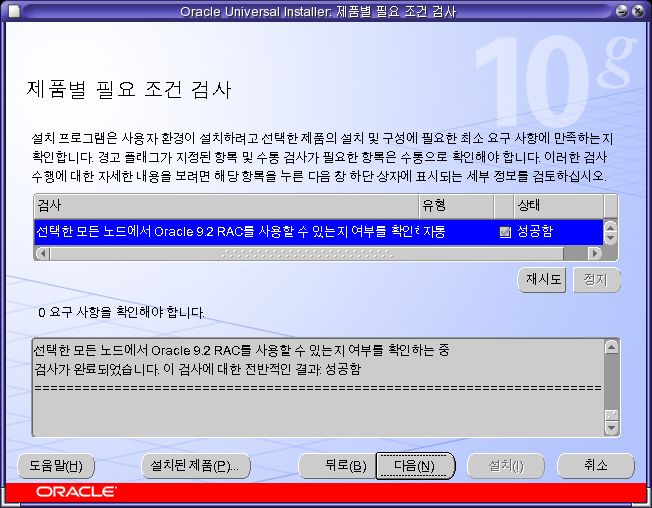
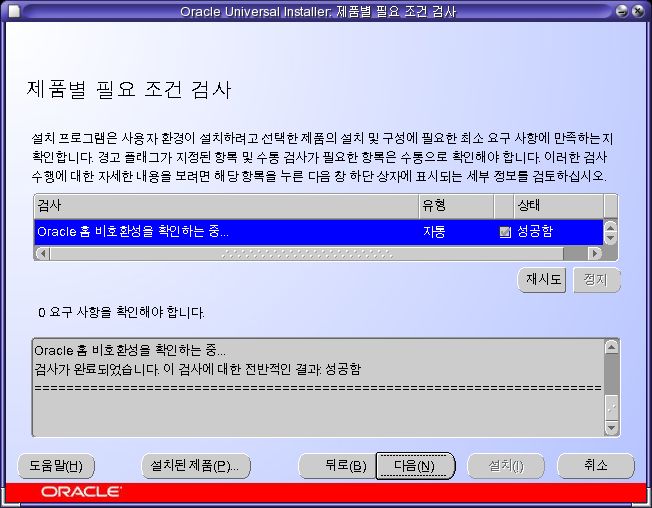
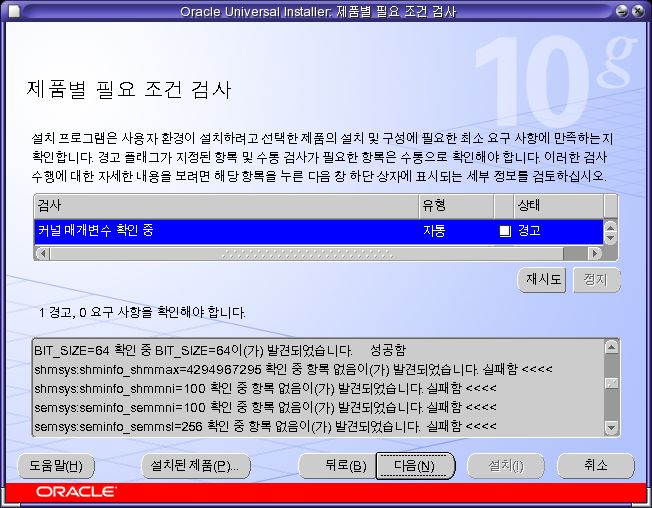
- 필요조건을 모두 만족시켜야 한다. [다음]을 클릭한다.
-
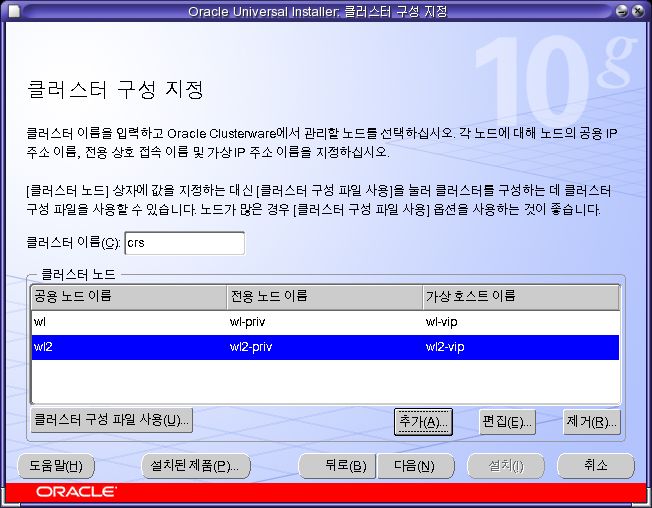
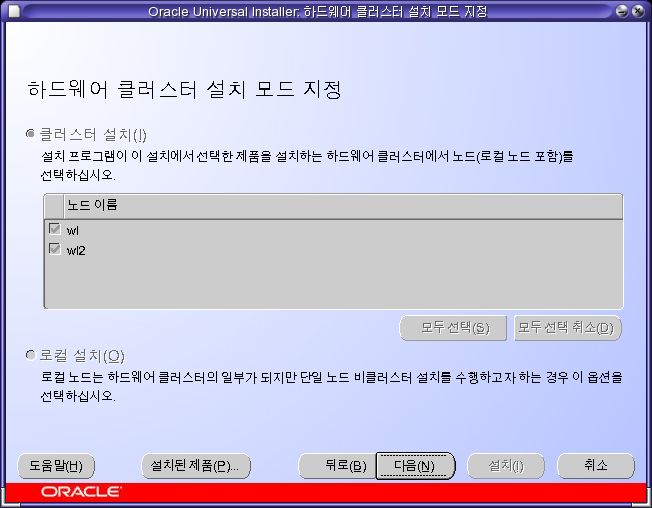
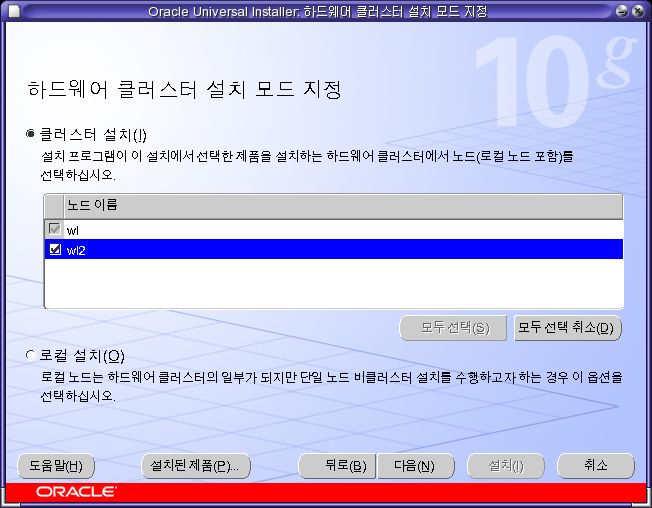
클러스터 구성을 설정한다.
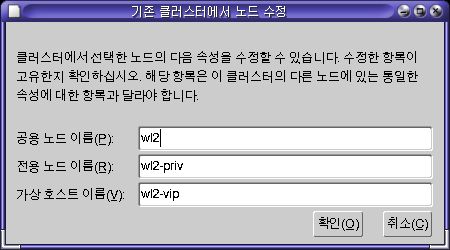
wl만 설정 되어있는데, [추가]를 클릭해 아래와 같이 입력한 후 확인을 누르면 된다.
-
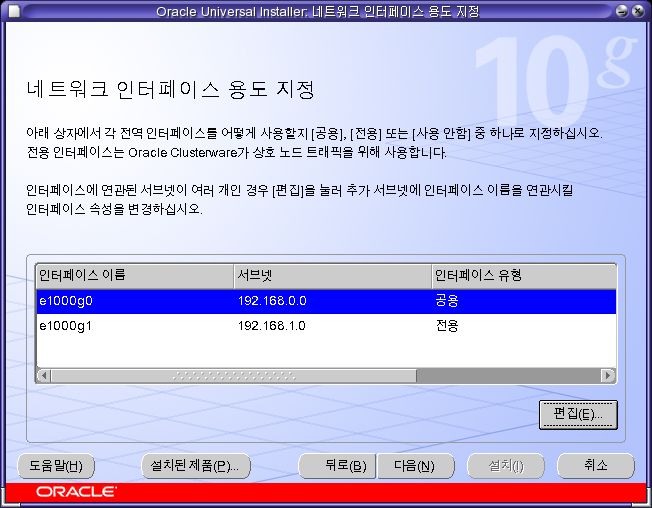
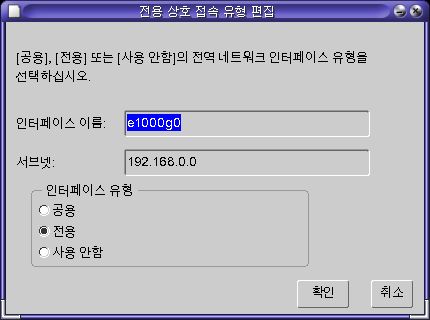
두 인터페이스 모두 [전용]으로 설정 되어있다. [e1000g0]을 선택한 후 [편집]을 클릭하면 아래와 같은 창이 뜬다. [인터페이스 유형]을 [공용]으로 변경한 후 확인을 클릭한다.
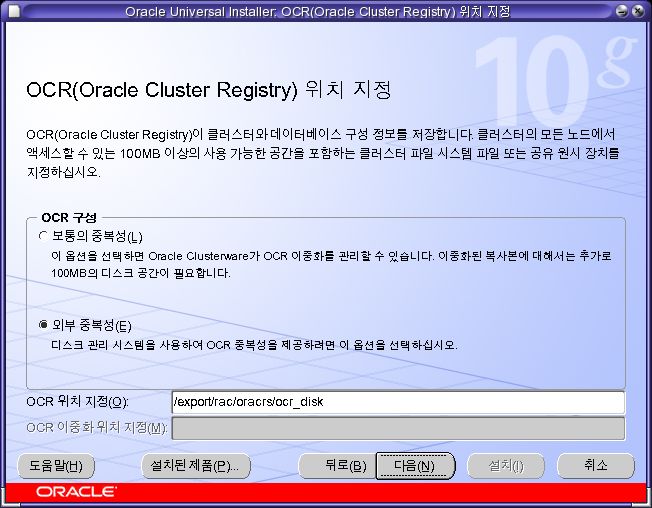
- CRS의 Registry로 사용될 디스크를 정의한다. [외부 중복성]을 선택한 후 [/export/rac/oracrs/ocr_disk]를 입력한다. /export/rac/oracrs/ocr_disk가 저장된 장치는 매우 안정적이어야 한다. (다운되거나, 디스크가 고장나면 절대 안된다. 그렇게 되는 경우 클러스터를 더이상 사용할 수 없을 것이다) 여기서는 설치 편의상 한개만 설정했다. 실무에서는 이중화된 저장 장치를 사용하거나, 여의치 않다면 [보통의 중복성]을 선택해 이중화해야 한다.

- [선호 디스크]란 voting disk를 의미한다. [외부 중복성]을 선택 한 후 [/export/rac/oracrs/voting_disk]를 입력한다. 역시 매우 안정적이어야 한다. [보통의 중복성]을 선택하는 경우, 3중화까지 해야한다.
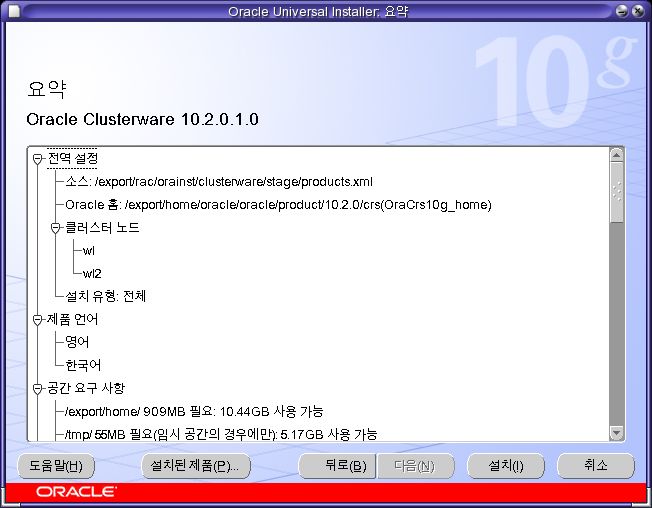
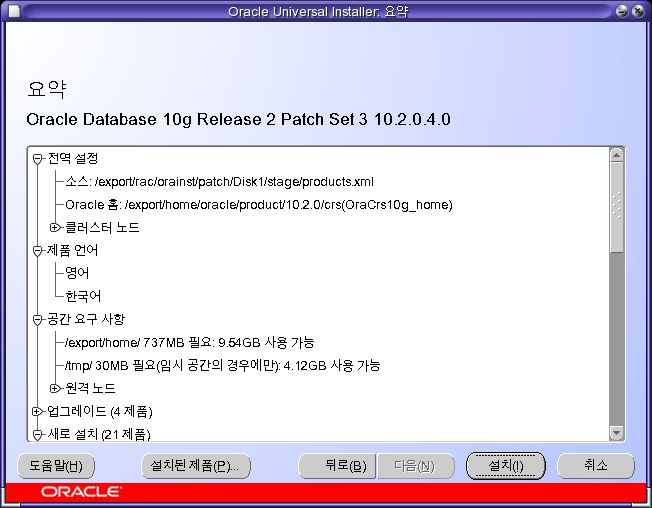
- [설치]를 클릭한다.

- 설치 진행중이다. 화면을 보면 4번째 스텝에 [원격 작업 보류중]이라 되어있을 것이다. scp와 tar를 이용해 원격 노드에도 자동으로 설치 파일을 전송한다.
-
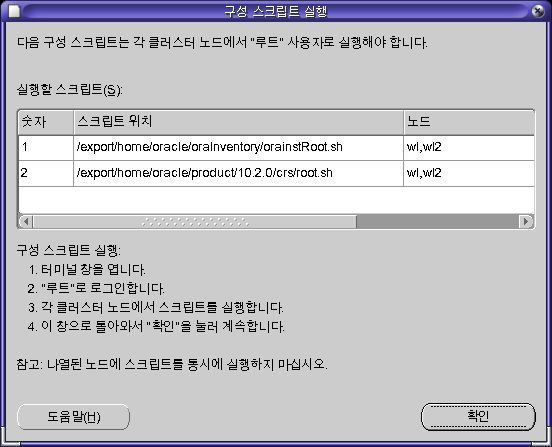
루트로 두가지 스크립트를 실행한다. 동시에 실행시켜서는 안된다.
root@wl2 /export/home/oracle/oraInventory # ./orainstRoot.sh
다음 권한 변경 중/export/home/oracle/oraInventory 대상 770.
그룹 이름 변경 중 /export/home/oracle/oraInventory 대상 oinstall.
스크립트 실행이 완료되었습니다.
root@wl2 /export/home/oracle/oraInventory #

root@wl2 /export/home/oracle/product/10.2.0/crs # ./root.sh
WARNING: directory '/export/home/oracle/product/10.2.0' is not owned by root
WARNING: directory '/export/home/oracle/product' is not owned by root
WARNING: directory '/export/home/oracle' is not owned by root
Checking to see if Oracle CRS stack is already configured

Setting the permissions on OCR backup directory
Setting up NS directories
Oracle Cluster Registry configuration upgraded successfully
WARNING: directory '/export/home/oracle/product/10.2.0' is not owned by root
WARNING: directory '/export/home/oracle/product' is not owned by root
WARNING: directory '/export/home/oracle' is not owned by root
Successfully accumulated necessary OCR keys.
Using ports: CSS=49895 CRS=49896 EVMC=49898 and EVMR=49897.
node <nodenumber>: <nodename> <private interconnect name> <hostname>
node 1: wl wl-priv wl
node 2: wl2 wl2-priv wl2
Creating OCR keys for user 'root', privgrp 'root'..
Operation successful.
Now formatting voting device: /export/rac/oracrs/voting_disk
Format of 1 voting devices complete.
Startup will be queued to init within 30 seconds.
Adding daemons to inittab
Expecting the CRS daemons to be up within 600 seconds.
CSS is active on these nodes.
        wl2
CSS is inactive on these nodes.
        wl
Local node checking complete.
Run root.sh on remaining nodes to start CRS daemons.
root@wl2 /export/home/oracle/product/10.2.0/crs #
root@wl /export/home/oracle/oraInventory # ./orainstRoot.sh
다음 권한 변경 중/export/home/oracle/oraInventory 대상 770.
그룹 이름 변경 중 /export/home/oracle/oraInventory 대상 oinstall.
스크립트 실행이 완료되었습니다.
root@wl /export/home/oracle/oraInventory #

root@wl /export/home/oracle/product/10.2.0/crs # ./root.sh
WARNING: directory '/export/home/oracle/product/10.2.0' is not owned by root
WARNING: directory '/export/home/oracle/product' is not owned by root
WARNING: directory '/export/home/oracle' is not owned by root
Checking to see if Oracle CRS stack is already configured

Setting the permissions on OCR backup directory
Setting up NS directories
Oracle Cluster Registry configuration upgraded successfully
WARNING: directory '/export/home/oracle/product/10.2.0' is not owned by root
WARNING: directory '/export/home/oracle/product' is not owned by root
WARNING: directory '/export/home/oracle' is not owned by root
clscfg: EXISTING configuration version 3 detected.
clscfg: version 3 is 10G Release 2.
Successfully accumulated necessary OCR keys.
Using ports: CSS=49895 CRS=49896 EVMC=49898 and EVMR=49897.
node <nodenumber>: <nodename> <private interconnect name> <hostname>
node 1: wl wl-priv wl
node 2: wl2 wl2-priv wl2
clscfg: Arguments check out successfully.

NO KEYS WERE WRITTEN. Supply -force parameter to override.
-force is destructive and will destroy any previous cluster
configuration.
Oracle Cluster Registry for cluster has already been initialized
Startup will be queued to init within 30 seconds.
Adding daemons to inittab
Expecting the CRS daemons to be up within 600 seconds.
CSS is active on these nodes.
        wl
        wl2
CSS is active on all nodes.
Waiting for the Oracle CRSD and EVMD to start
Oracle CRS stack installed and running under init(1M)
Running vipca(silent) for configuring nodeapps

(2) 노드에 VIP 응용 프로그램 리소스 생성...
(2) 노드에 GSD 응용 프로그램 리소스 생성...
(2) 노드에 ONS 응용 프로그램 리소스 생성...
(2) 노드에서 VIP 응용 프로그램 리소스 시작...
(2) 노드에서 GSD 응용 프로그램 리소스 시작...
(2) 노드에서 ONS 응용 프로그램 리소스 시작...


Done.
root@wl /export/home/oracle/product/10.2.0/crs #

- 구성을 확인하고 클러스터를 실행시킨다.
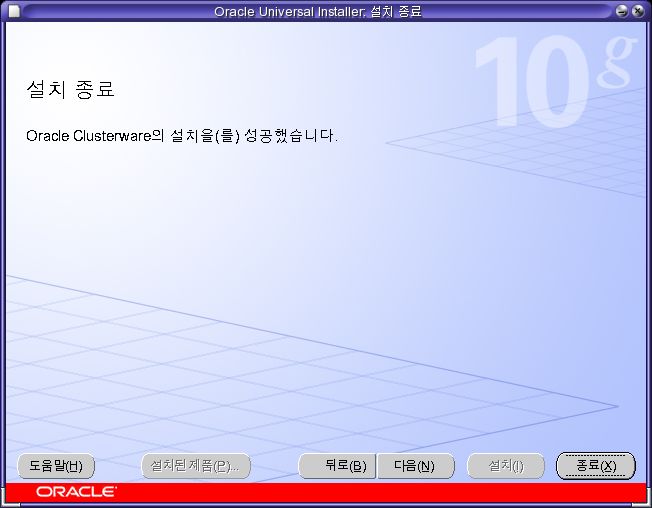
- 종료를 클릭해 마친다.
설치가 완료되면 아래와 같이 클러스터 설치 내용을 확인할 수 있다. VIP가 e1000g0에 설정되었다.
root@wl /export/home/oracle/product/10.2.0/crs/bin # ./oifcfg iflist
e1000g0  192.168.0.0
e1000g1  192.168.1.0
root@wl /export/home/oracle/product/10.2.0/crs/bin # ifconfig -a
lo0: flags=2001000849<UP,LOOPBACK,RUNNING,MULTICAST,IPv4,VIRTUAL> mtu 8232 index 1
        inet 127.0.0.1 netmask ff000000
e1000g0: flags=1000843<UP,BROADCAST,RUNNING,MULTICAST,IPv4> mtu 1500 index 2
        inet 192.168.0.101 netmask ffffff00 broadcast 192.168.0.255
        ether 8:0:27:52:1b:41
e1000g0:1: flags=1040843<UP,BROADCAST,RUNNING,MULTICAST,DEPRECATED,IPv4> mtu 1500 index 2
        inet 192.168.0.151 netmask ffffff00 broadcast 192.168.0.255
e1000g1: flags=1000843<UP,BROADCAST,RUNNING,MULTICAST,IPv4> mtu 1500 index 3
        inet 192.168.1.101 netmask ffffff00 broadcast 192.168.1.255
        ether 8:0:27:6d:94:22
root@wl /export/home/oracle/product/10.2.0/crs/bin # ./crsctl check crs
CSS appears healthy
CRS appears healthy
EVM appears healthy
root@wl /export/home/oracle/product/10.2.0/crs/bin # ./crs_stat -t
Name           Type           Target    State     Host
------------------------------------------------------------
ora.wl.gsd     application    ONLINE    ONLINE    wl
ora.wl.ons     application    ONLINE    ONLINE    wl
ora.wl.vip     application    ONLINE    ONLINE    wl
ora.wl2.gsd    application    ONLINE    ONLINE    wl2
ora.wl2.ons    application    ONLINE    ONLINE    wl2
ora.wl2.vip    application    ONLINE    ONLINE    wl2
clusterware 패치
이 문서의 내용을 따라하기 위해 반드시 해야하는건 아니다.

- [다음]을 클릭한다.
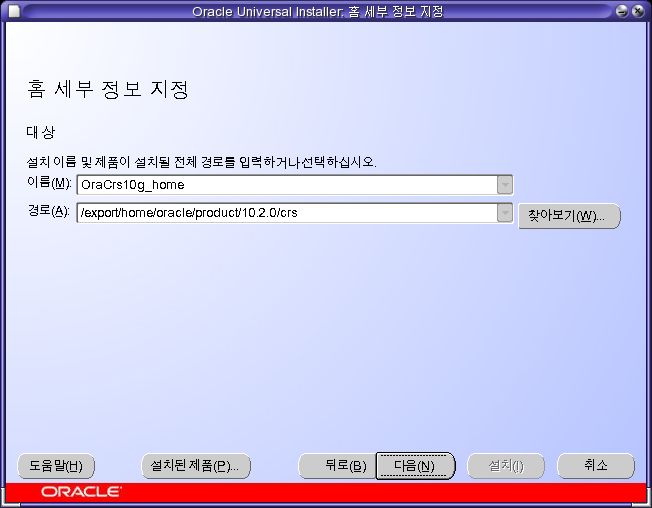
- [OraCrs10g_Home]을 선택하고 [다음]을 클릭한다.
- [다음]을 클릭한다.
- [다음]을 클릭한다.
- [설치]를 클릭한다.

- 설치가 끝날때까지 기다린다.
- [종료]를 클릭한다.
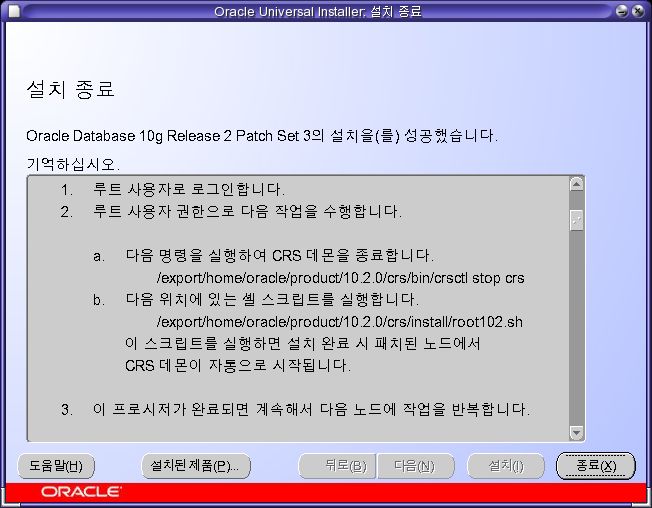
클러스터웨어 패치 설치를 마쳤으면, CRS 데몬을 종료한 후, 라이브러리를 패치하고 다시 시작해야 한다.
root@wl /export/home/oracle/product/10.2.0/crs/bin # ./crsctl stop crs
Stopping resources.
Successfully stopped CRS resources
Stopping CSSD.
Shutting down CSS daemon.
Shutdown request successfully issued.
root@wl /export/home/oracle/product/10.2.0/crs/bin # cd ../install
root@wl /export/home/oracle/product/10.2.0/crs/install # ./root102.sh
Creating pre-patch directory for saving pre-patch clusterware files
Completed patching clusterware files to /export/home/oracle/product/10.2.0/crs
Relinking some shared libraries.
ar: /export/home/oracle/product/10.2.0/crs/lib32/libn10.a을(를) 쓰는 중
ar: /export/home/oracle/product/10.2.0/crs/lib/libn10.a을(를) 쓰는 중
ar: /export/home/oracle/product/10.2.0/crs/lib32/libn10.a을(를) 쓰는 중
ar: /export/home/oracle/product/10.2.0/crs/lib/libn10.a을(를) 쓰는 중
Relinking of patched files is complete.
Preparing to recopy patched init and RC scripts.
Recopying init and RC scripts.
Startup will be queued to init within 30 seconds.
Starting up the CRS daemons.
Waiting for the patched CRS daemons to start.
  This may take a while on some systems.
.
10204 patch successfully applied.
clscfg: EXISTING configuration version 3 detected.
clscfg: version 3 is 10G Release 2.
Successfully accumulated necessary OCR keys.
Using ports: CSS=49895 CRS=49896 EVMC=49898 and EVMR=49897.
node <nodenumber>: <nodename> <private interconnect name> <hostname>
node 1: wl wl-priv wl
Creating OCR keys for user 'root', privgrp 'root'..
Operation successful.
clscfg -upgrade completed successfully
root@wl /export/home/oracle/product/10.2.0/crs/install #
root@wl2 /export/home/oracle/product/10.2.0/crs/bin # ./crsctl stop crs
Stopping resources.
Successfully stopped CRS resources
Stopping CSSD.
Shutting down CSS daemon.
Shutdown request successfully issued.
root@wl2 /export/home/oracle/product/10.2.0/crs/bin # cd ../install
root@wl2 /export/home/oracle/product/10.2.0/crs/install # ./root102.sh
Creating pre-patch directory for saving pre-patch clusterware files
Completed patching clusterware files to /export/home/oracle/product/10.2.0/crs
Relinking some shared libraries.
ar: /export/home/oracle/product/10.2.0/crs/lib32/libn10.a을(를) 쓰는 중
ar: /export/home/oracle/product/10.2.0/crs/lib/libn10.a을(를) 쓰는 중
ar: /export/home/oracle/product/10.2.0/crs/lib32/libn10.a을(를) 쓰는 중
ar: /export/home/oracle/product/10.2.0/crs/lib/libn10.a을(를) 쓰는 중
Relinking of patched files is complete.
Preparing to recopy patched init and RC scripts.
Recopying init and RC scripts.
Startup will be queued to init within 30 seconds.
Starting up the CRS daemons.
Waiting for the patched CRS daemons to start.
  This may take a while on some systems.
.
10204 patch successfully applied.
clscfg: EXISTING configuration version 3 detected.
clscfg: version 3 is 10G Release 2.
Successfully accumulated necessary OCR keys.
Using ports: CSS=49895 CRS=49896 EVMC=49898 and EVMR=49897.
node <nodenumber>: <nodename> <private interconnect name> <hostname>
node 2: wl2 wl2-priv wl2
Creating OCR keys for user 'root', privgrp 'root'..
Operation successful.
clscfg -upgrade completed successfully
root@wl2 /export/home/oracle/product/10.2.0/crs/install #
[WARNING: directory 'xxx' is not owned by root], [Warning: Absolute relocation is used for symbol~] 메시지는 무시한다. (표기하지 않았다)
database 설치
root@wl ~ # xhost +
root@wl ~ # su - oracle
oracle@wl ~ $ cd /export/rac/orainst/database
oracle@wl /export/rac/orainst/database $ ./runInstaller
- [다음]을 클릭한다.
- [다음]을 클릭한다.
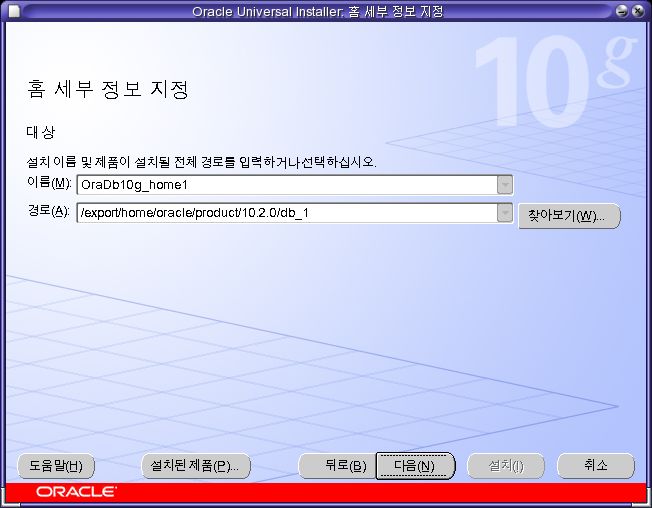
- 이름과 경로를 화면과 같이 설정하고 [다음]을 클릭한다.
- 두 노드를 모두 선택한다. [다음]을 클릭한다.
- 경고는 1개만 발생해야 한다. project를 사용했기 때문이다. [다음]을 클릭한다.
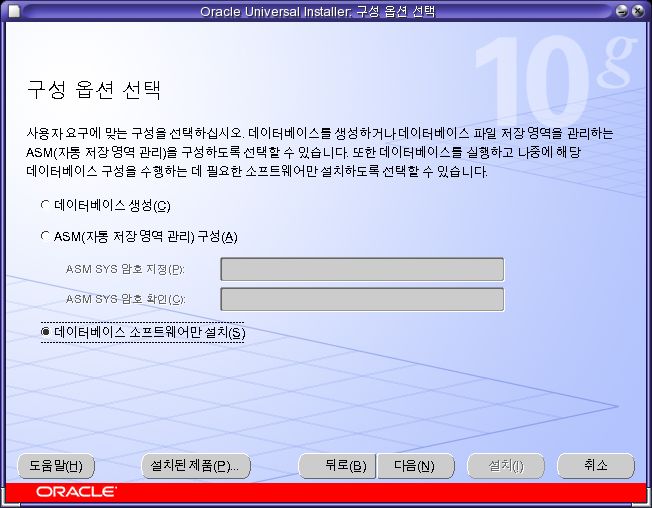
- [데이터베이스 소프트웨어만 설치]를 선택하고 [다음]을 클릭한다.

- [설치]을 클릭한다.
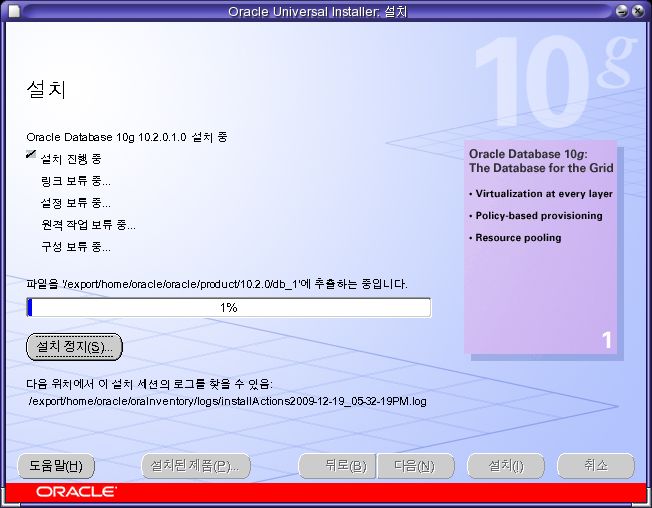
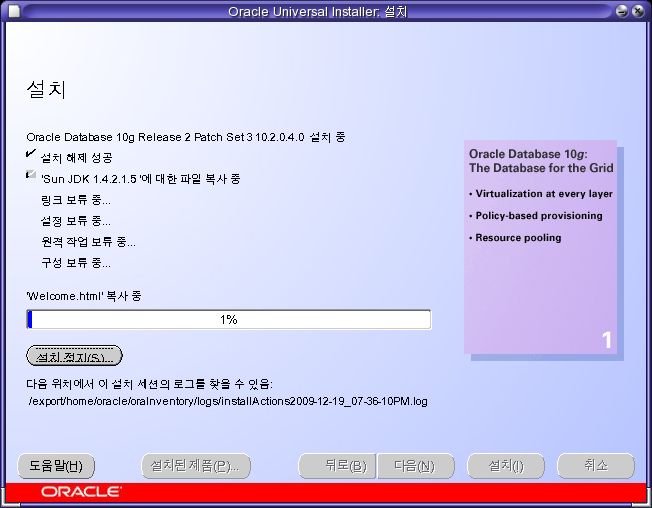
- 설치가 완료될때까지 기다린다. 시간이 꽤 걸린다.

-
각 노드에서 루트 계정으로 root.sh를 실행한 후 [확인]을 클릭한다.
root@wl,wl2 /export/home/oracle/product/10.2.0/db_1 # ./root.sh
Running Oracle10 root.sh script...

The following environment variables are set as:
    ORACLE_OWNER= oracle
    ORACLE_HOME=  /export/home/oracle/product/10.2.0/db_1

Enter the full pathname of the local bin directory: [/usr/local/bin]:
   Copying dbhome to /usr/local/bin ...
   Copying oraenv to /usr/local/bin ...
   Copying coraenv to /usr/local/bin ...


Creating /var/opt/oracle/oratab file...
Entries will be added to the /var/opt/oracle/oratab file as needed by
Database Configuration Assistant when a database is created
Finished running generic part of root.sh script.
Now product-specific root actions will be performed.
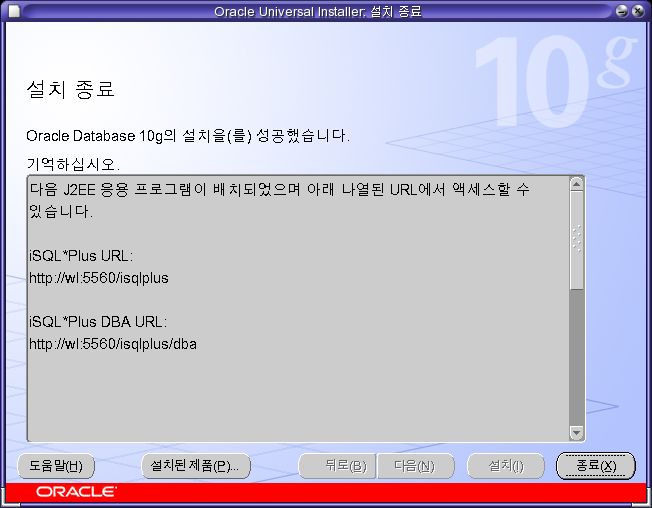
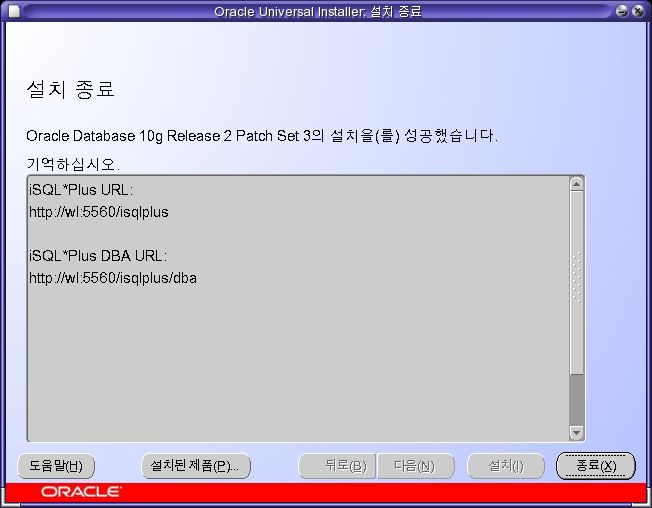
- 설치가 완료되었다. [종료]을 클릭한다.
database 패치
- [다음]을 클릭한다.

- [OraDb10g_home1]을 선택하고 [다음]을 클릭한다.

- [다음]을 클릭한다.

- [다음]을 클릭한다.
- [설치]을 클릭한다.
- 설치가 완료될때까지 기다린다.

-
각 노드에서 루트 계정으로 root.sh를 실행한 후 [확인]을 클릭한다.
root@wl,wl2 /export/home/oracle/product/10.2.0/db_1 # ./root.sh
Running Oracle10 root.sh script...

The following environment variables are set as:
    ORACLE_OWNER= oracle
    ORACLE_HOME=  /export/home/oracle/product/10.2.0/db_1

Enter the full pathname of the local bin directory: [/usr/local/bin]:
The file "dbhome" already exists in /usr/local/bin.  Overwrite it? (y/n) [n]: y
   Copying dbhome to /usr/local/bin ...
The file "oraenv" already exists in /usr/local/bin.  Overwrite it? (y/n) [n]: y
   Copying oraenv to /usr/local/bin ...
The file "coraenv" already exists in /usr/local/bin.  Overwrite it? (y/n) [n]: y
   Copying coraenv to /usr/local/bin ...

Entries will be added to the /var/opt/oracle/oratab file as needed by
Database Configuration Assistant when a database is created
Finished running generic part of root.sh script.
Now product-specific root actions will be performed.
- [종료]를 클릭한다.
netca
root@wl ~ # xhost +
root@wl ~ # su - oracle
oracle@wl ~ $ netca
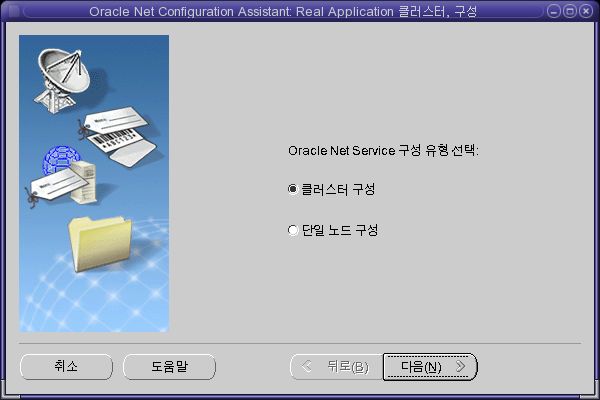
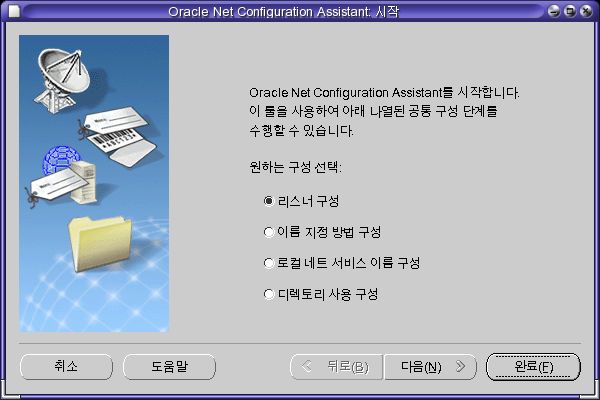
- [클러스터 구성]을 선택하고 [다음]을 클릭한다.
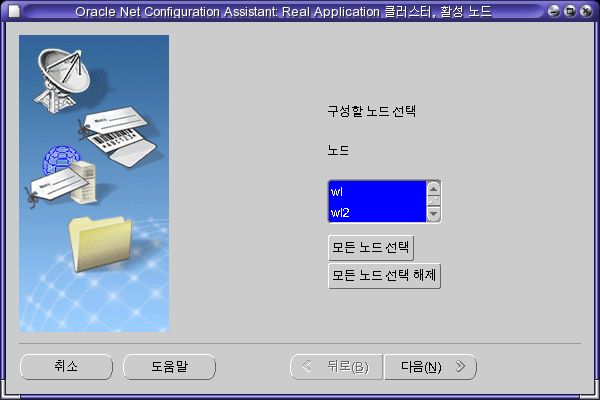
- [모든 노드 선택]을 클릭하고 [다음]을 클릭한다.
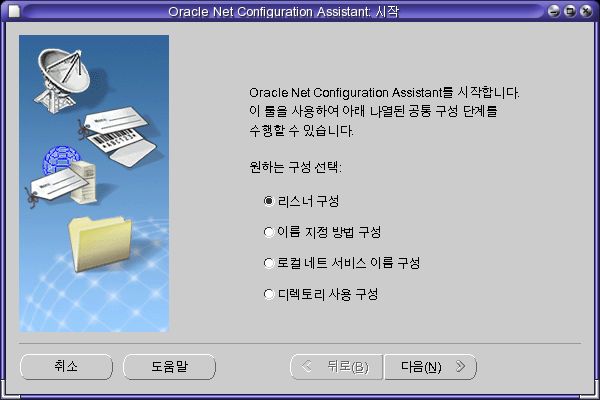
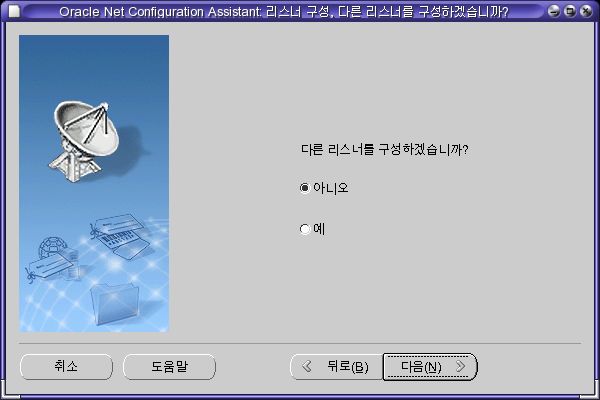
- [리스너 구성]을 선택하고 [다음]을 클릭한다.
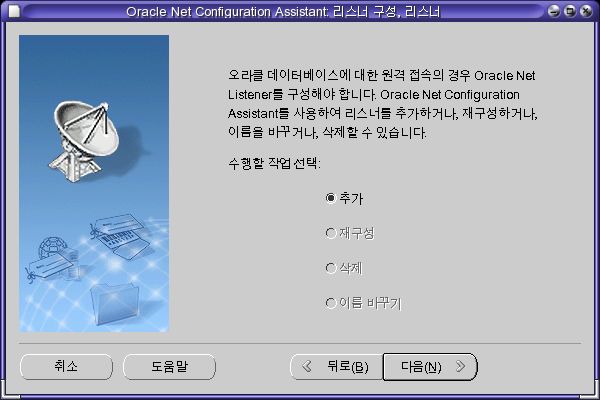
- [추가]를 선택하고 [다음]을 클릭한다.
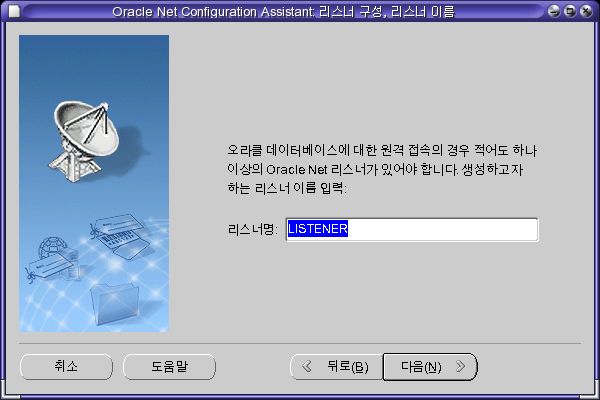
- 리스너명을 입력한 후 [다음]을 클릭한다.
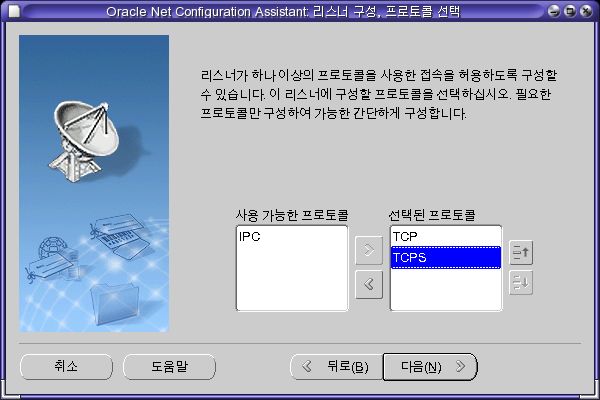
- [TCPS]도 추가한 후 [다음]을 클릭한다.
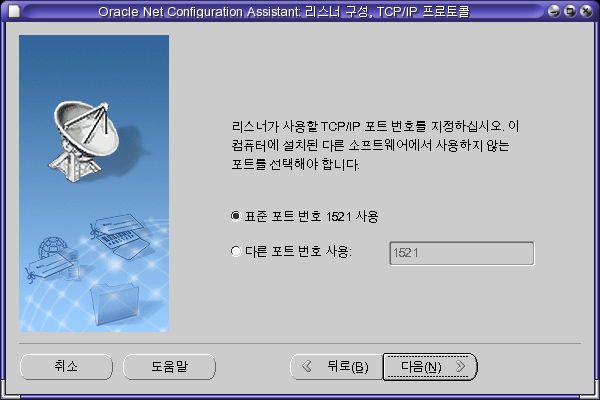
- [다음]을 클릭한다.

- [다음]을 클릭한다.
- [다음]을 클릭한다. 잠시 기다리고 있으면 다음 화면이 나온다.
- [다음]을 클릭한다.
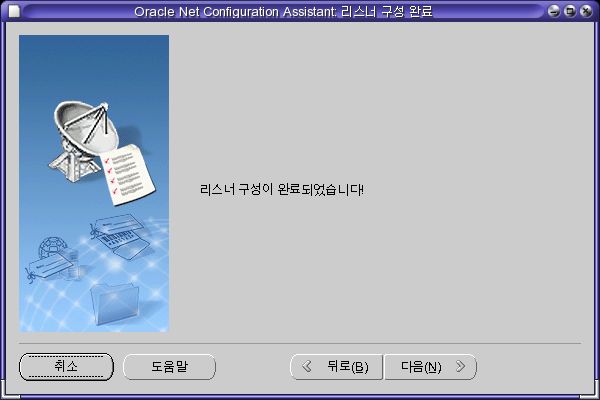
- [완료]을 클릭한다.
아래와 같이 각각의 노드에 LISTENER 도 실행된 것을 확인할 수 있다.
root@wl ~ # crsstat
HA Resource                                   Target     State
-----------                                   ------     -----
ora.wl.LISTENER_WL.lsnr                       ONLINE     ONLINE on wl
ora.wl.gsd                                    ONLINE     ONLINE on wl
ora.wl.ons                                    ONLINE     ONLINE on wl
ora.wl.vip                                    ONLINE     ONLINE on wl
ora.wl2.LISTENER_WL2.lsnr                     ONLINE     ONLINE on wl2
ora.wl2.gsd                                   ONLINE     ONLINE on wl2
ora.wl2.ons                                   ONLINE     ONLINE on wl2
ora.wl2.vip                                   ONLINE     ONLINE on wl2
root@wl ~ #
dbca - ASM
ASM(Automatic Storage Management)은 오라클에서 제공하는 저장장치 관리자이다. 하지만 솔라리스에서는 다른 유닉스와는 달리 RAC에서도 NFS를 이용해 데이터베이스 파일을 생성할 수 있기 때문에, ASM을 반드시 사용해야하는건 아니다. (솔라리스 외에 리눅스도 NFS를 사용해 생성할 수 있다) ASM을 소개하는 정도로만 생각하면 된다.
root@wl ~ # xhost +
root@wl ~ # su - oracle
oracle@wl ~ $ dbca

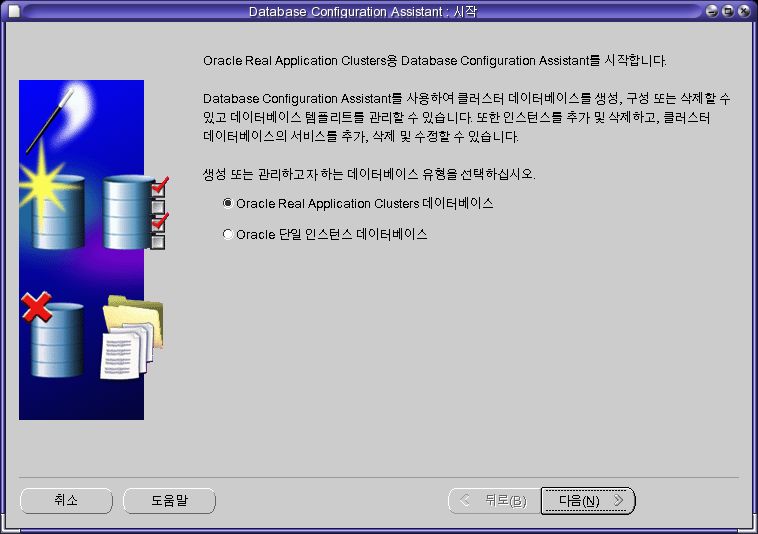
- [Oracle Real Application Clusters 데이터 베이스]를 선택하고 [다음]을 클릭한다.

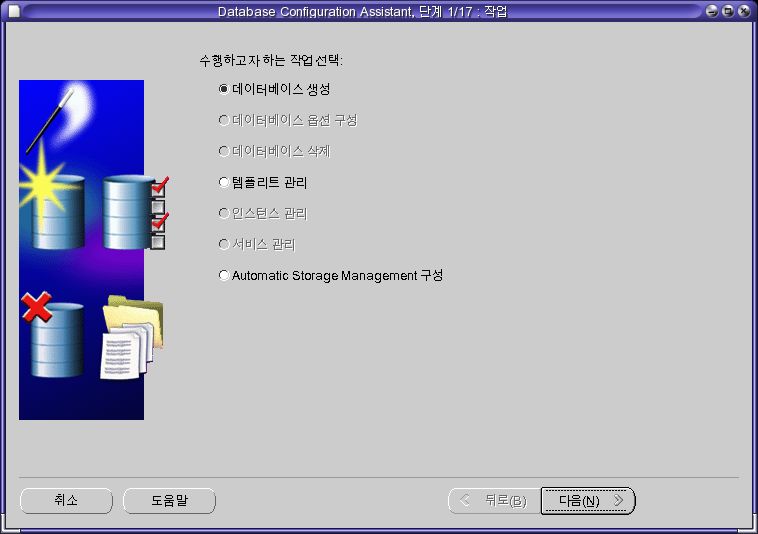
- [Automatic Storage Management 구성]을 선택하고 [다음]을 클릭한다.
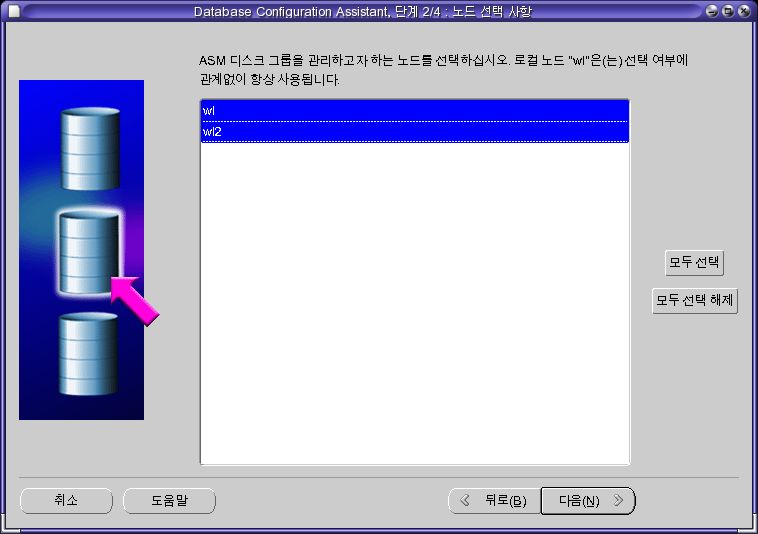
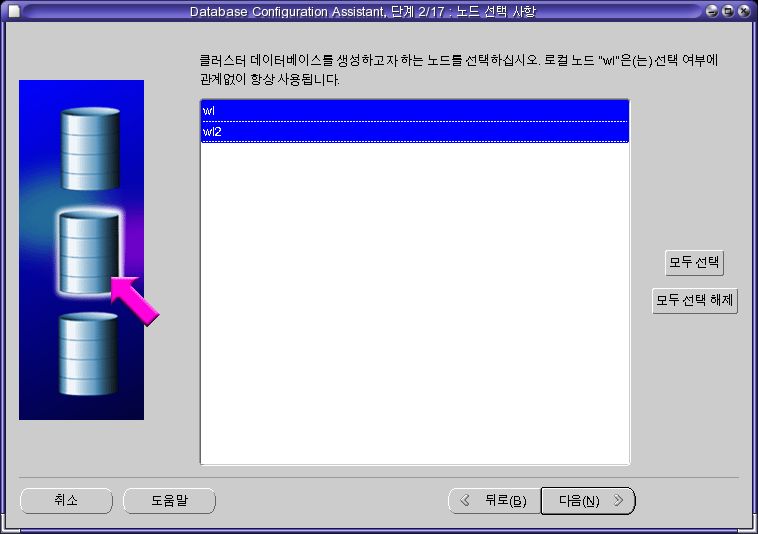
- 두 노드를 선택하고 [다음]을 클릭한다.
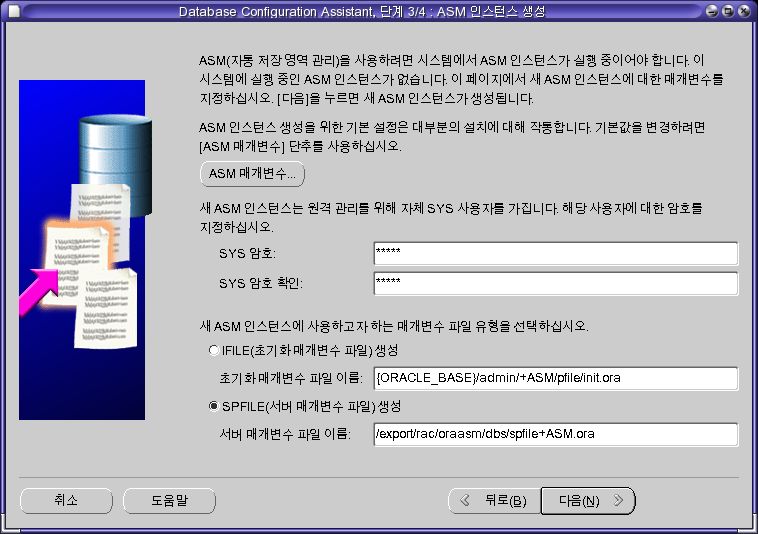
- 암호와 [서버 매개변수 파일 이름]을 입력한 후 [다음]을 클릭한다.
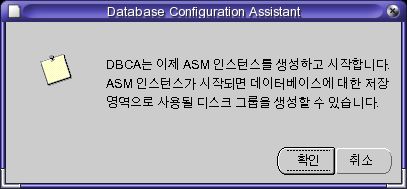

- [확인]을 클릭하면 ASM 인스턴스를 생성한다. 잠시 기다리면 다음으로 넘어간다.
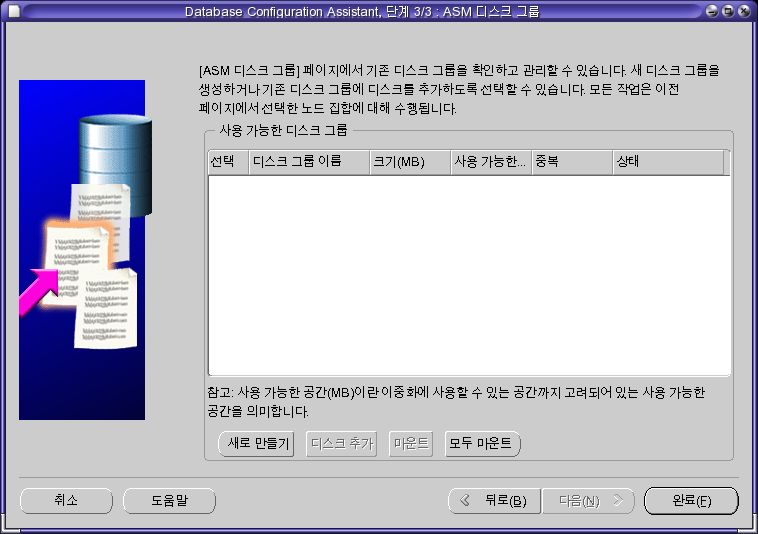
- [새로 만들기]를 클릭한다.
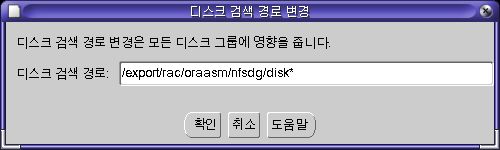
- 멤버 디스크 후보를 지정하기 위해 [디스크 검색경로 변경]을 클릭하고 아래와 같이 입력한다.
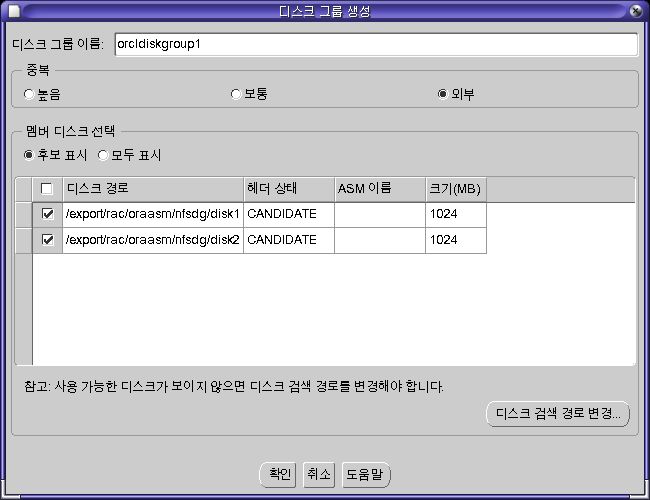
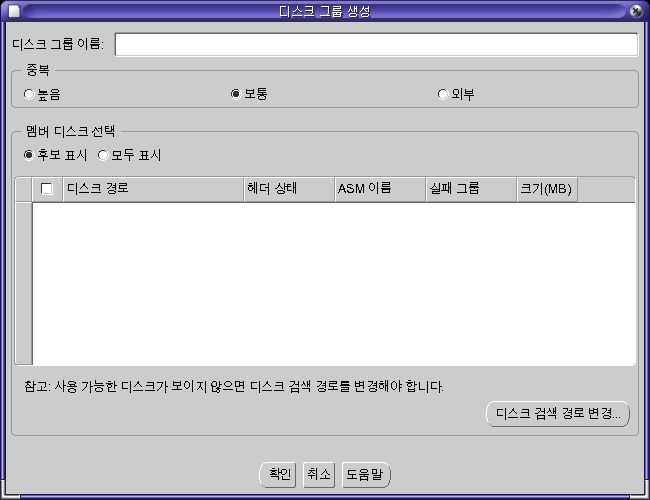
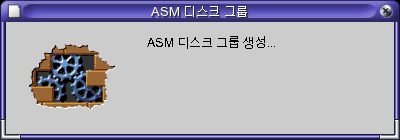
- 왼쪽 화면과 같이 입력한다. 디스크 그룹 이름에는 orcldiskgroup1을, 중복은 외부를 선택하고, 두개의 디스크를 모두 선택한다. [확인]을 클릭하면 아래와 같이 그룹을 생성하는 화면이 나온다. 잠시 기다리면 다음으로 넘어간다.
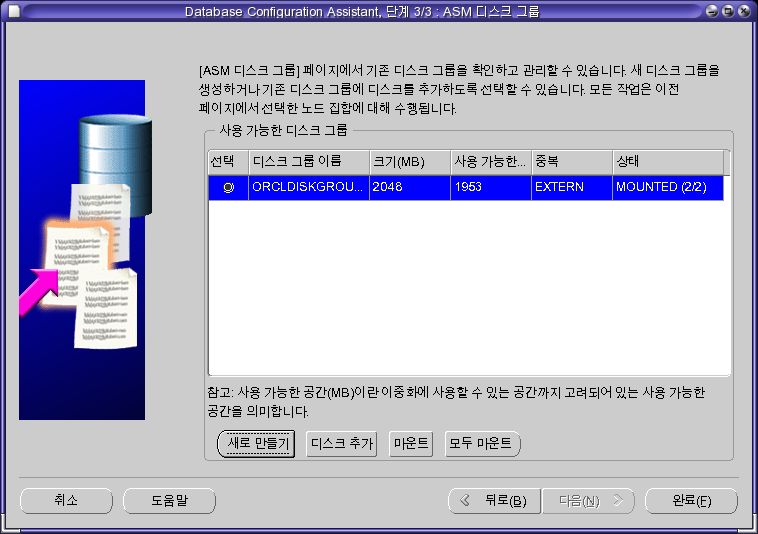
- 디스크 그룹이 추가된것을 확인할 수 있다.[완료]를 클릭한다.
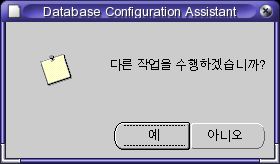
- [아니오]를 클릭해 dbca를 종료한다.
아래와 같이 각각의 노드에서 ASM이 실행된 것을 확인할 수 있다.
root@wl ~ # crsstat
HA Resource                                   Target     State
-----------                                   ------     -----
ora.wl.ASM1.asm                               ONLINE     ONLINE on wl
ora.wl.LISTENER_WL.lsnr                       ONLINE     ONLINE on wl
ora.wl.gsd                                    ONLINE     ONLINE on wl
ora.wl.ons                                    ONLINE     ONLINE on wl
ora.wl.vip                                    ONLINE     ONLINE on wl
ora.wl2.ASM2.asm                              ONLINE     ONLINE on wl2
ora.wl2.LISTENER_WL2.lsnr                     ONLINE     ONLINE on wl2
ora.wl2.gsd                                   ONLINE     ONLINE on wl2
ora.wl2.ons                                   ONLINE     ONLINE on wl2
ora.wl2.vip                                   ONLINE     ONLINE on wl2
root@wl ~ #
dbca - 데이터베이스 생성
마지막으로 데이터 베이스를 생성할 차례이다.
root@wl ~ # xhost +
root@wl ~ # su - oracle
oracle@wl ~ $ dbca
- [Oracle Real Application Clusters 데이터베이스]를 선택한 후 [다음]을 클릭한다.
- [데이터베이스 생성]을 선택한 후 [다음]을 클릭한다.
- 노드를 선택한 후 [다음]을 클릭한다.
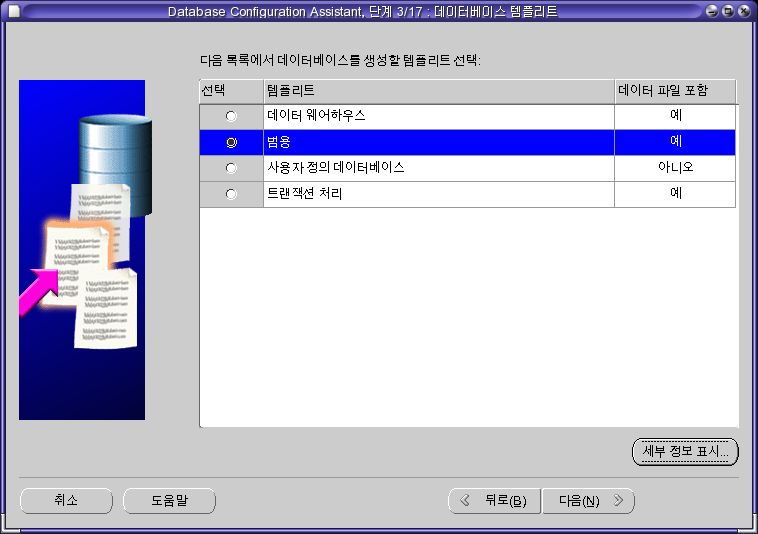
- [범용]을 선택한 후 [다음]을 클릭한다. 만약 이후 데이터베이스 생성 단계에서 오류가 발생하면 [사용자 정의 데이터베이스]를 선택한다.
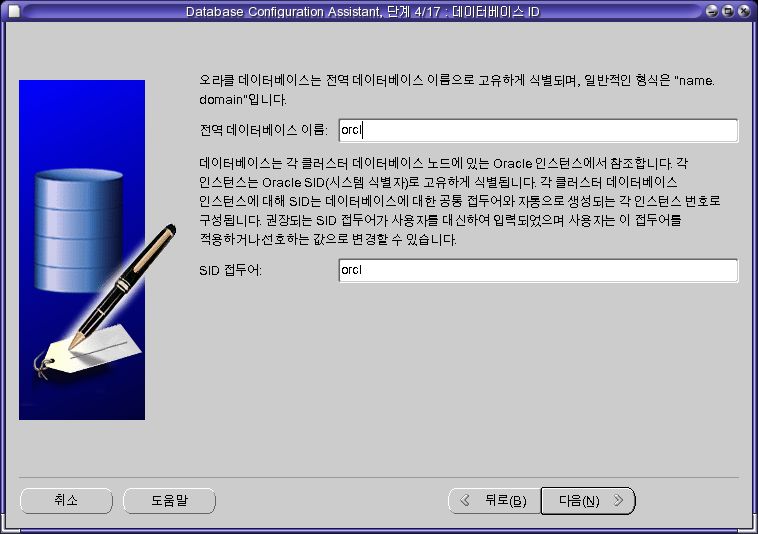
- [orcl]을 입력한 후 [다음]을 클릭한다.
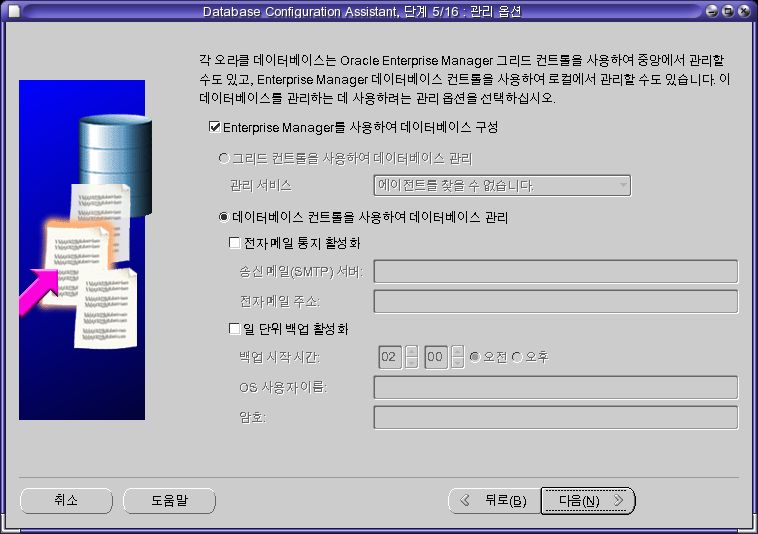
- [다음]을 클릭한다.
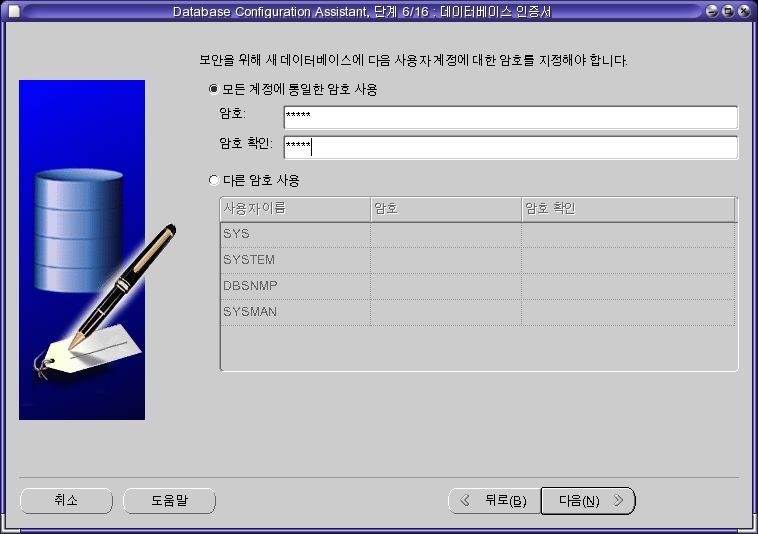
- 암호를 입력한 후 [다음]을 클릭한다.
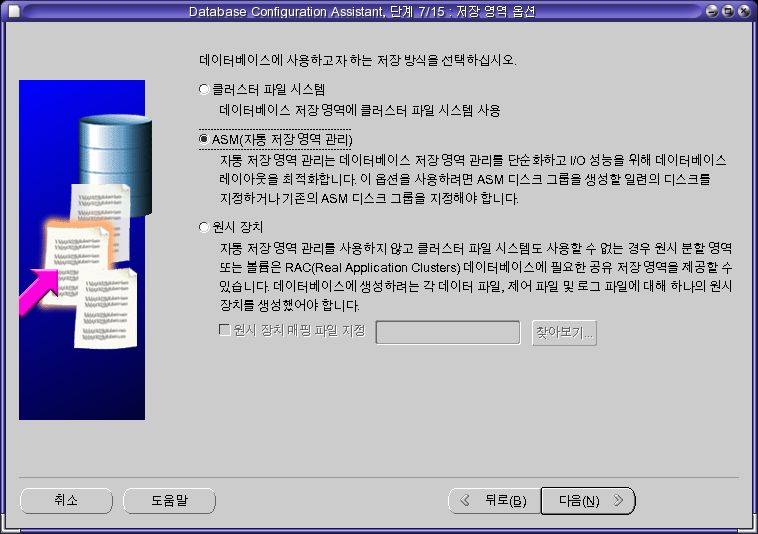
- [ASM(자동 저장 영역 관리)]를 선택한 후 [다음]을 클릭한다.
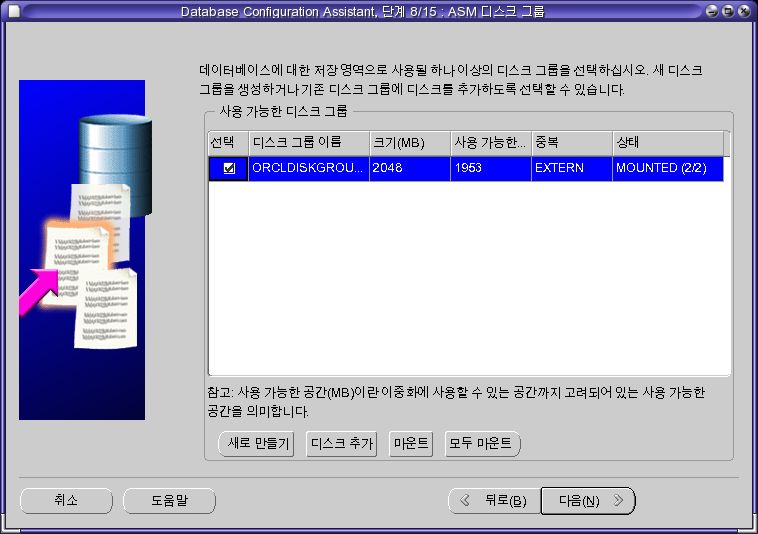
- 디스크 그룹을 선택한 후 [다음]을 클릭한다.
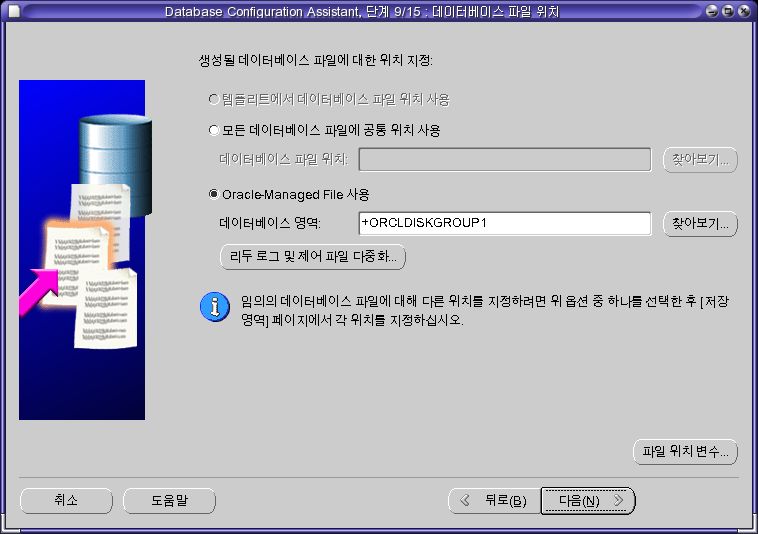
- [다음]을 클릭한다.
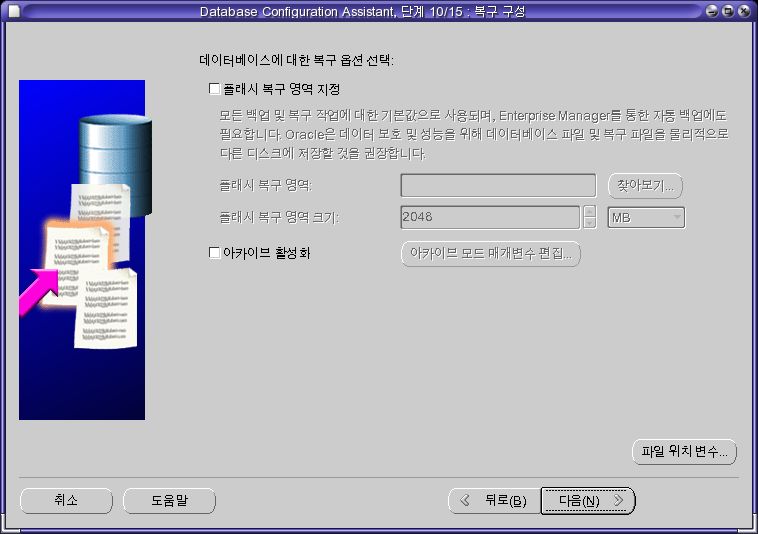
- [다음]을 클릭한다.

- [다음]을 클릭한다.
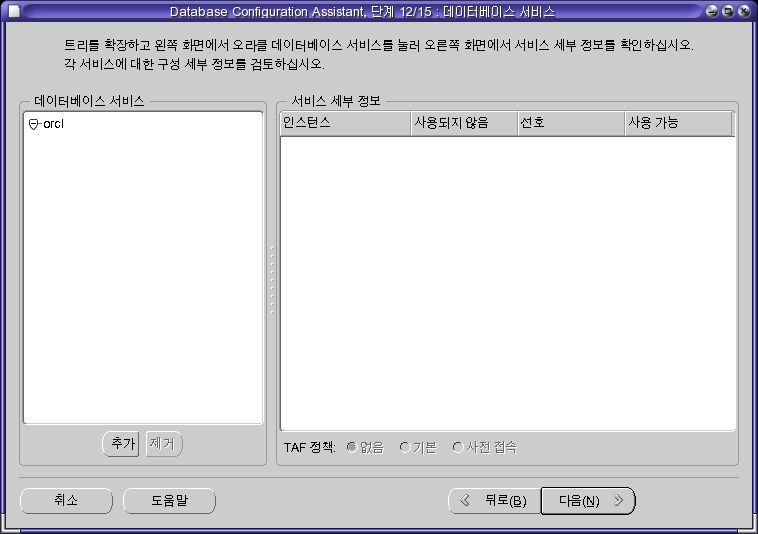
- [다음]을 클릭한다. TAF는 별도로 다룰 것이다.
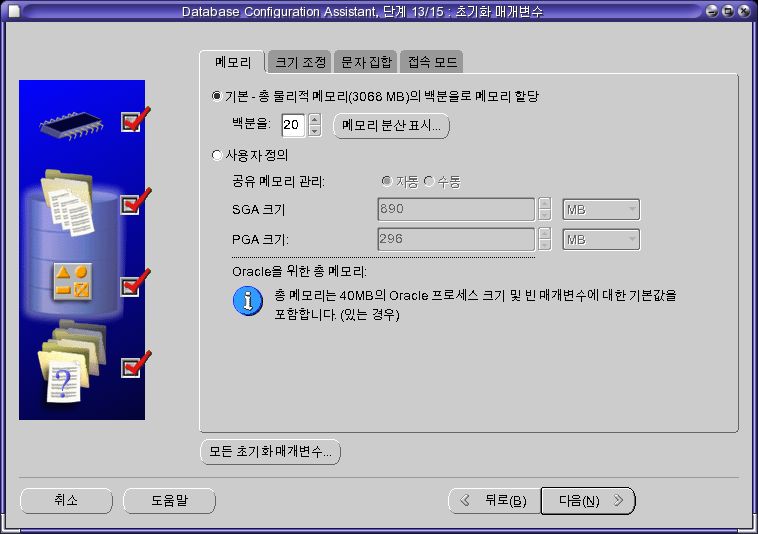
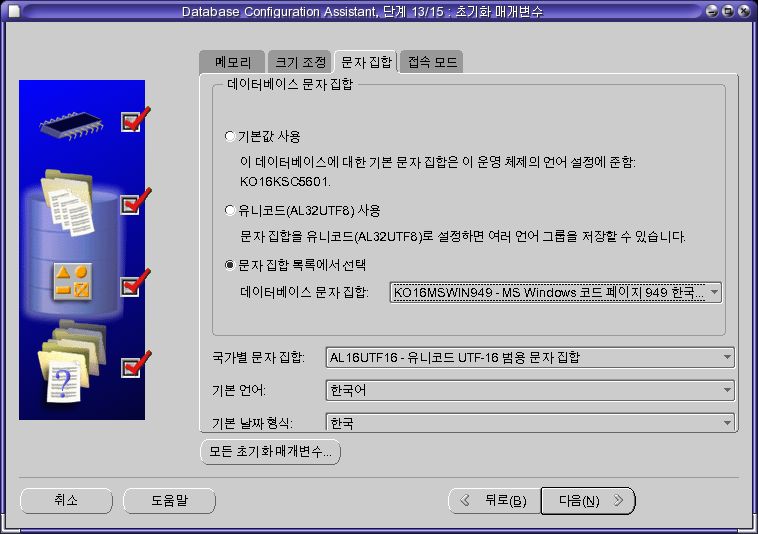
- 메모리와 캐릭터 셋을 선택한 후 [다음]을 클릭한다.
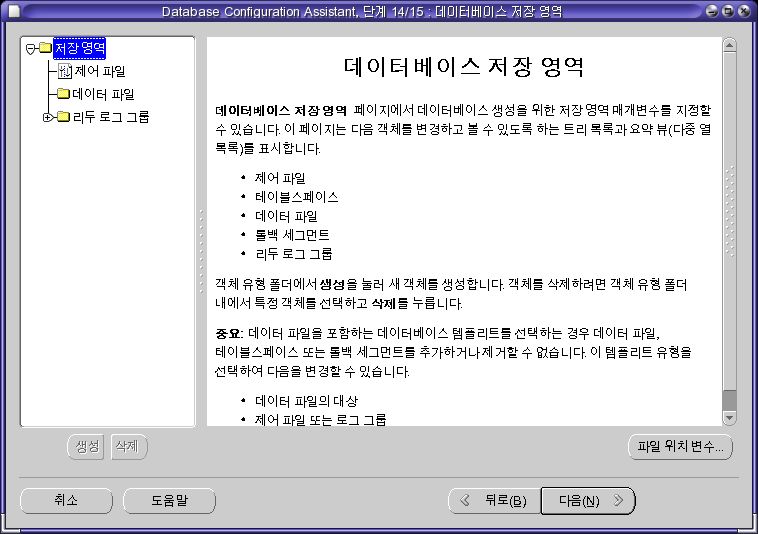
- [다음]을 클릭한다.
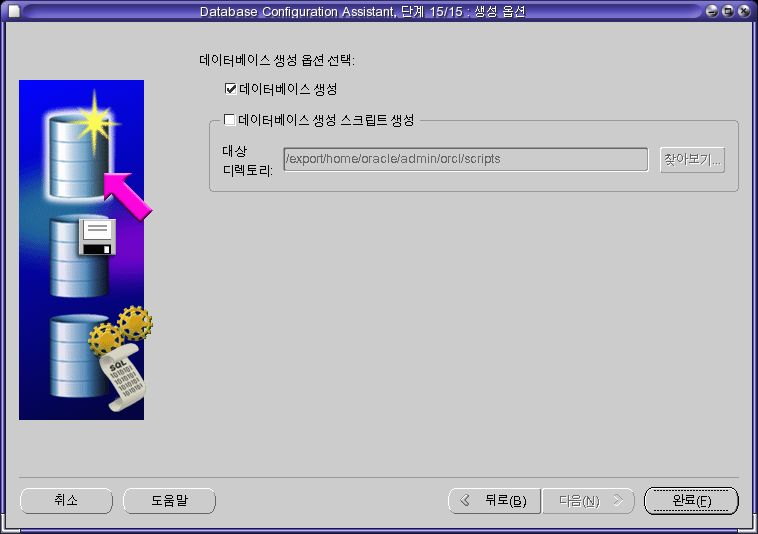
- [완료]을 클릭한다.

- [확인]을 클릭한다.
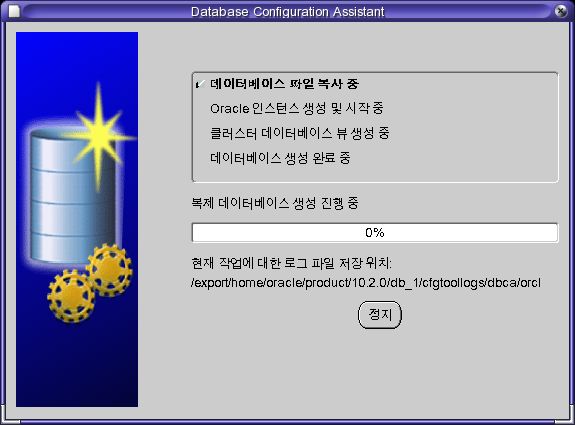
- 데이터베이스를 생성하는 중이다.
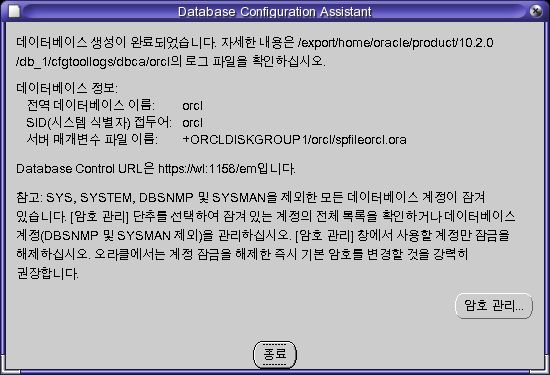
- [종료]을 클릭한다.
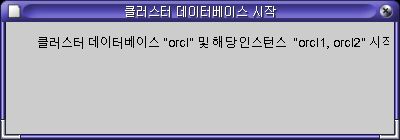
- 종료를 클릭하면 데이터베이스를 시작할 것이다.
아래와 같이 db가 생성되었고, 각각의 노드에 인스턴스가 생성된 것을 확인 할 수 있다.
root@wl ~ # crsstat
HA Resource                                   Target     State
-----------                                   ------     -----
ora.orcl.db                                   ONLINE     ONLINE on wl
ora.orcl.orcl1.inst                           ONLINE     ONLINE on wl
ora.orcl.orcl2.inst                           ONLINE     ONLINE on wl2
ora.wl.ASM1.asm                               ONLINE     ONLINE on wl
ora.wl.LISTENER_WL.lsnr                       ONLINE     ONLINE on wl
ora.wl.gsd                                    ONLINE     ONLINE on wl
ora.wl.ons                                    ONLINE     ONLINE on wl
ora.wl.vip                                    ONLINE     ONLINE on wl
ora.wl2.ASM2.asm                              ONLINE     ONLINE on wl2
ora.wl2.LISTENER_WL2.lsnr                     ONLINE     ONLINE on wl2
ora.wl2.gsd                                   ONLINE     ONLINE on wl2
ora.wl2.ons                                   ONLINE     ONLINE on wl2
ora.wl2.vip                                   ONLINE     ONLINE on wl2
root@wl ~ #
설정확인
설정확인은 system 계정으로 아래와 같이 할 수 있다.
oracle@wl ~ $ sqlplus system

SQL*Plus: Release 10.2.0.4.0 - Production on 토 1월 9 21:33:53 2010

Copyright (c) 1982, 2007, Oracle.  All Rights Reserved.

암호 입력:

다음에 접속됨:
Oracle Database 10g Enterprise Edition Release 10.2.0.4.0 - Production
With the Partitioning, Real Application Clusters, OLAP, Data Mining
and Real Application Testing options

SQL> select * from v$active_instances;

INST_NUMBER
-----------
INST_NAME
--------------------------------------------------------------------------------
          1
wl:orcl1

          2
wl2:orcl2


SQL> SELECT NAME,STATE,TYPE FROM V$ASM_DISKGROUP;

NAME
--------------------------------------------------------------------------------
STATE                             TYPE
--------------------------------- ------------------
ORCLDISKGROUP1
CONNECTED                         EXTERN


SQL>
SQL> SELECT NAME FROM V$DATAFILE;

NAME
--------------------------------------------------------------------------------
+ORCLDISKGROUP1/orcl/datafile/system.266.707852873
+ORCLDISKGROUP1/orcl/datafile/undotbs1.262.707852999
+ORCLDISKGROUP1/orcl/datafile/sysaux.261.707853055
+ORCLDISKGROUP1/orcl/datafile/undotbs2.264.707853113
+ORCLDISKGROUP1/orcl/datafile/users.259.707853189

SQL> exit
Oracle Database 10g Enterprise Edition Release 10.2.0.4.0 - Production
With the Partitioning, Real Application Clusters, OLAP, Data Mining
and Real Application Testing options에서 분리되었습니다.
oracle@wl ~ $
